Types of Non-Contact 3D Scanning Methods
Post 3D Scan
Rooted in the science of precise measurement, photogrammetry is the practice of stitching 2D images from multiple angles into a 3D object.
Depending on the size and type of capture, the number of photographs required could range from a few dozen to thousands.
Depending on the size and type of capture, the number of photographs required could range from a few dozen to thousands.

Photogrammetry is based on a technique called Structure from Motion, similar to how we understand depth by moving around an object.
The software compares similar features in a pair or a series of photographs to visualize the shape and appearance of an object or environment. Photogrammetry can also gather information about capture locations, angles, and sequence.
The software compares similar features in a pair or a series of photographs to visualize the shape and appearance of an object or environment. Photogrammetry can also gather information about capture locations, angles, and sequence.
To get photos from all angels you can build a camera rig like this, and fire all cameras at the same time.
However, what we will focus on here is doing photogrammetry with just one camera.
However, what we will focus on here is doing photogrammetry with just one camera.
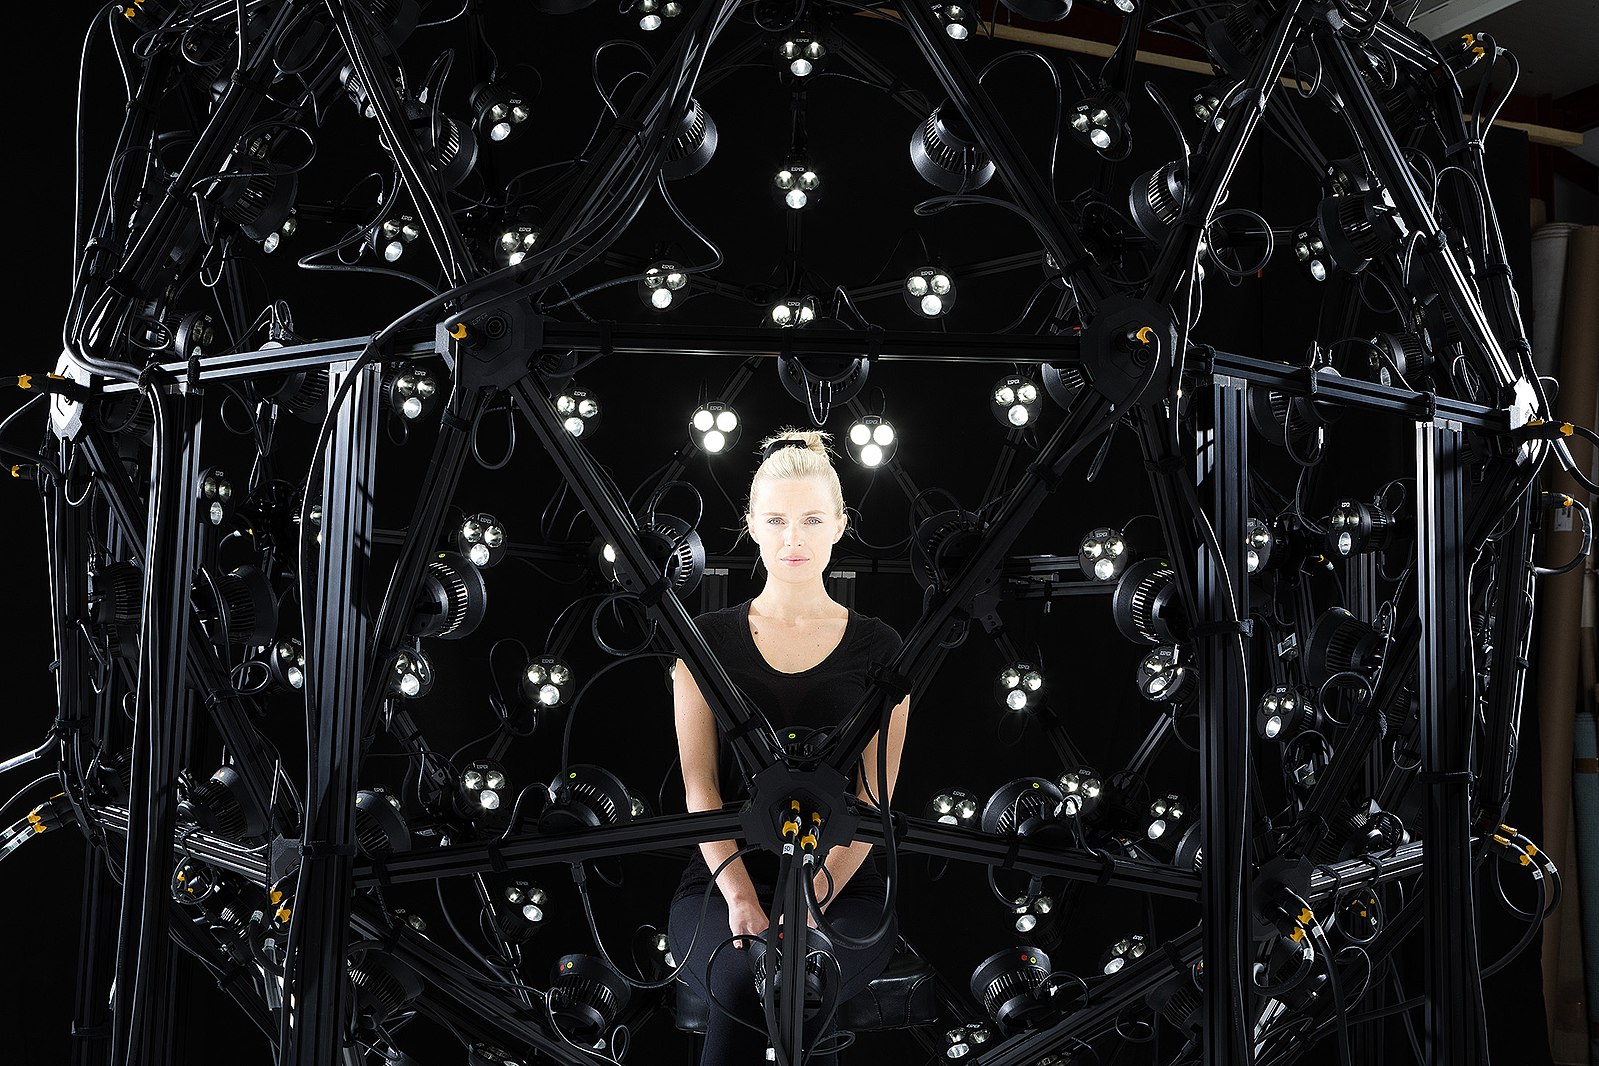
(photo: ESPER HQ)
Hardware
Phone Camera:
Usually a phone camera is good enough for photogrammetry capture.
Try to make sure things are in focus by tapping the screen prior to taking a photograph. If auto white balance is giving you inconsistent photos, try to lock the white balance so it doesn’t shift from shot to shot.
GoPro:
GoPros and a remote control could be a cheap way to create a camera grid. Fish eye lens is also good for environment capture. The EXIF data (metadata embedded in images) from photos will help the software to do necessary lens callibration.
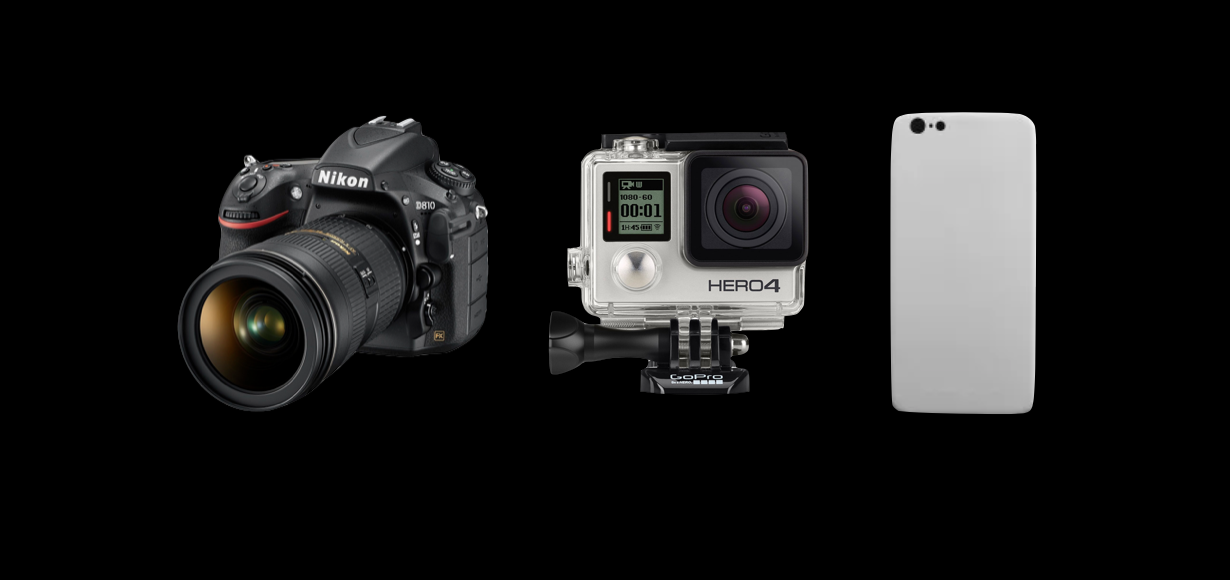
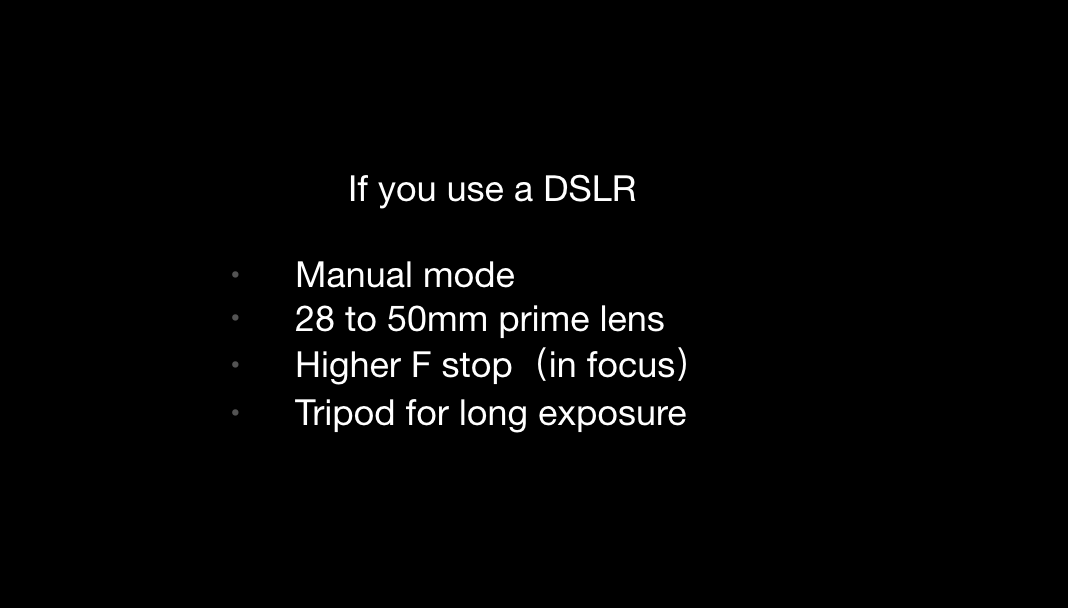
DSLR:
(1) For a more consistent texture, use Manual Mode to avoid brightness differences.
(2) Use a prime lens, 28 to 50mm. Avoid changing focal length when using a zoom lens.
(3) Use higher F stop to make sure everything is in focus.
(4) Use a tripod to avoid movement; a tripod is also helpful in low light conditions.
Note that photogrammetry software usually works with video as well as images.
This will help if you have time constraints or if you don’t want to draw too much attention to yourself while you are capturing your images (if you are in a public place, for instance).
This will help if you have time constraints or if you don’t want to draw too much attention to yourself while you are capturing your images (if you are in a public place, for instance).
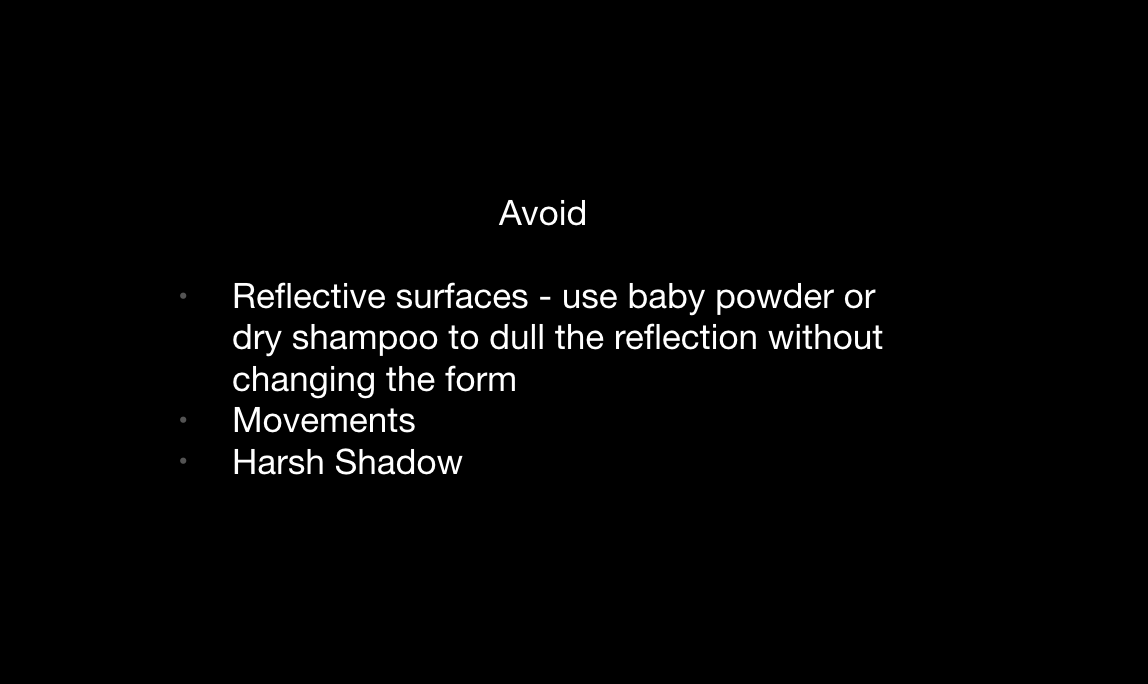
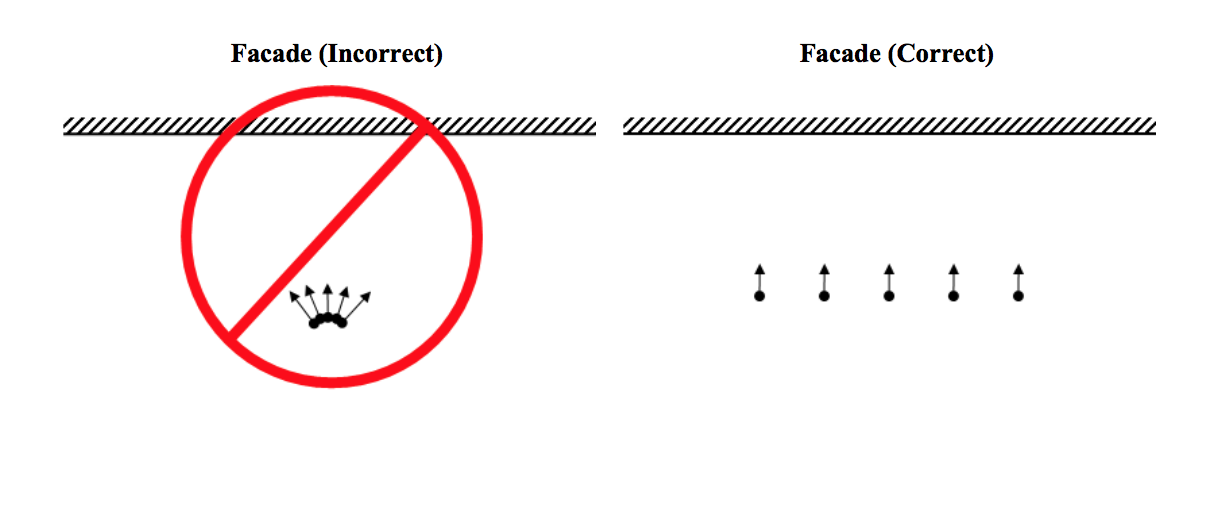
Reflective surfaces will not be accurately recognized by photogrammetry software.
If you’re scanning, for example, a glass surface, coat the glass in baby powder or a material that will keep the light from reflecting on the surface.
If you’re scanning, for example, a glass surface, coat the glass in baby powder or a material that will keep the light from reflecting on the surface.
Software
Agisoft Metashape:
Works with most operating systems, is relatively affordable
RealityCapture:
PC and Linux only.
Meshroom:
Free, open-source, macOS users requires GPU or additional setup.
Works with most operating systems, is relatively affordable
RealityCapture:
PC and Linux only.
Meshroom:
Free, open-source, macOS users requires GPU or additional setup.
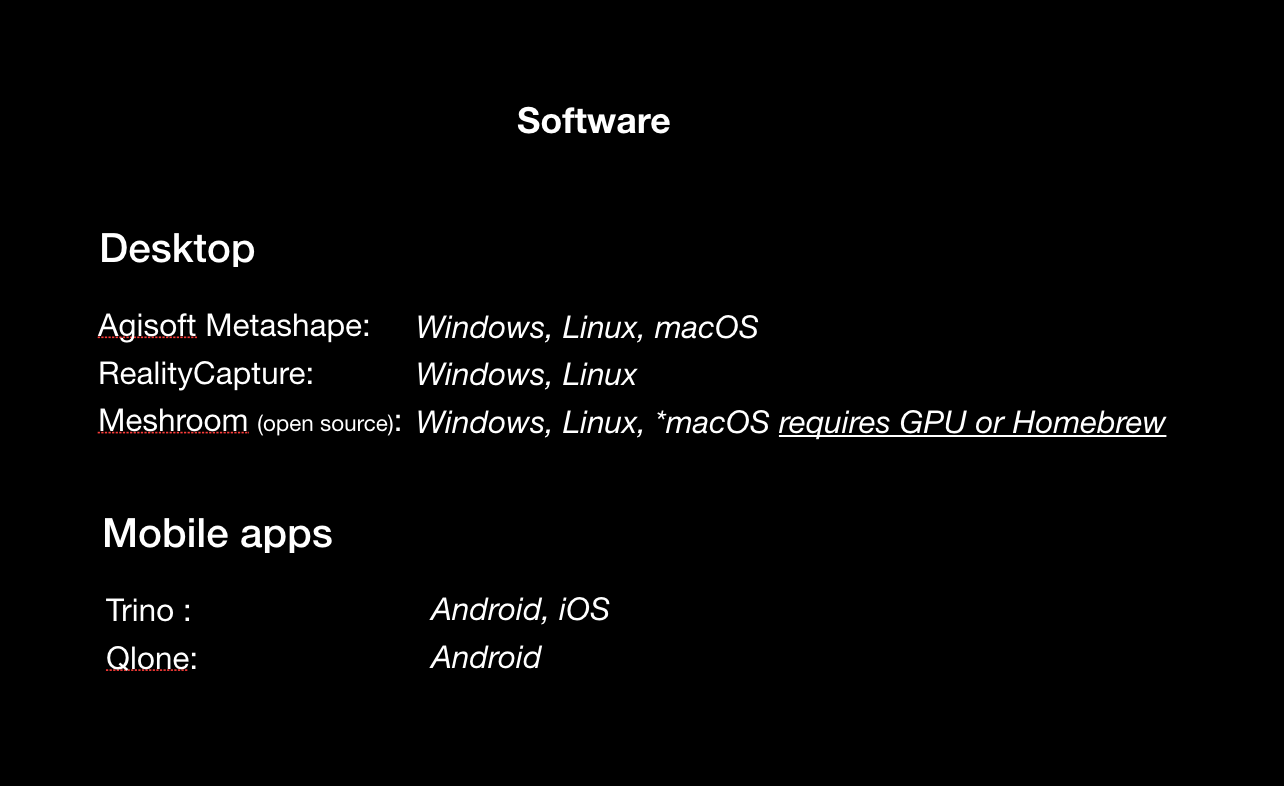
Trino and Qlone are both mobile apps that upload and reconstruct photos on their cloud server.
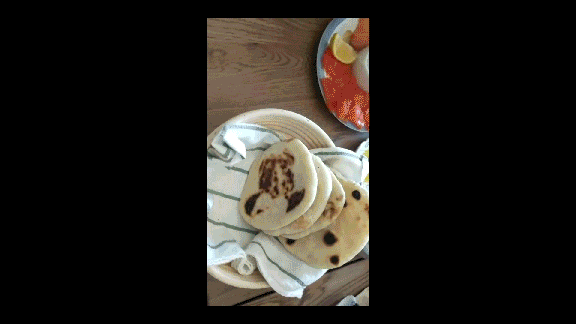
Here you see a small object constructed using Trino, scanned by workshop participant 承恩.
Here you see a small object constructed using Trino, scanned by workshop participant 承恩.
Object Capture:
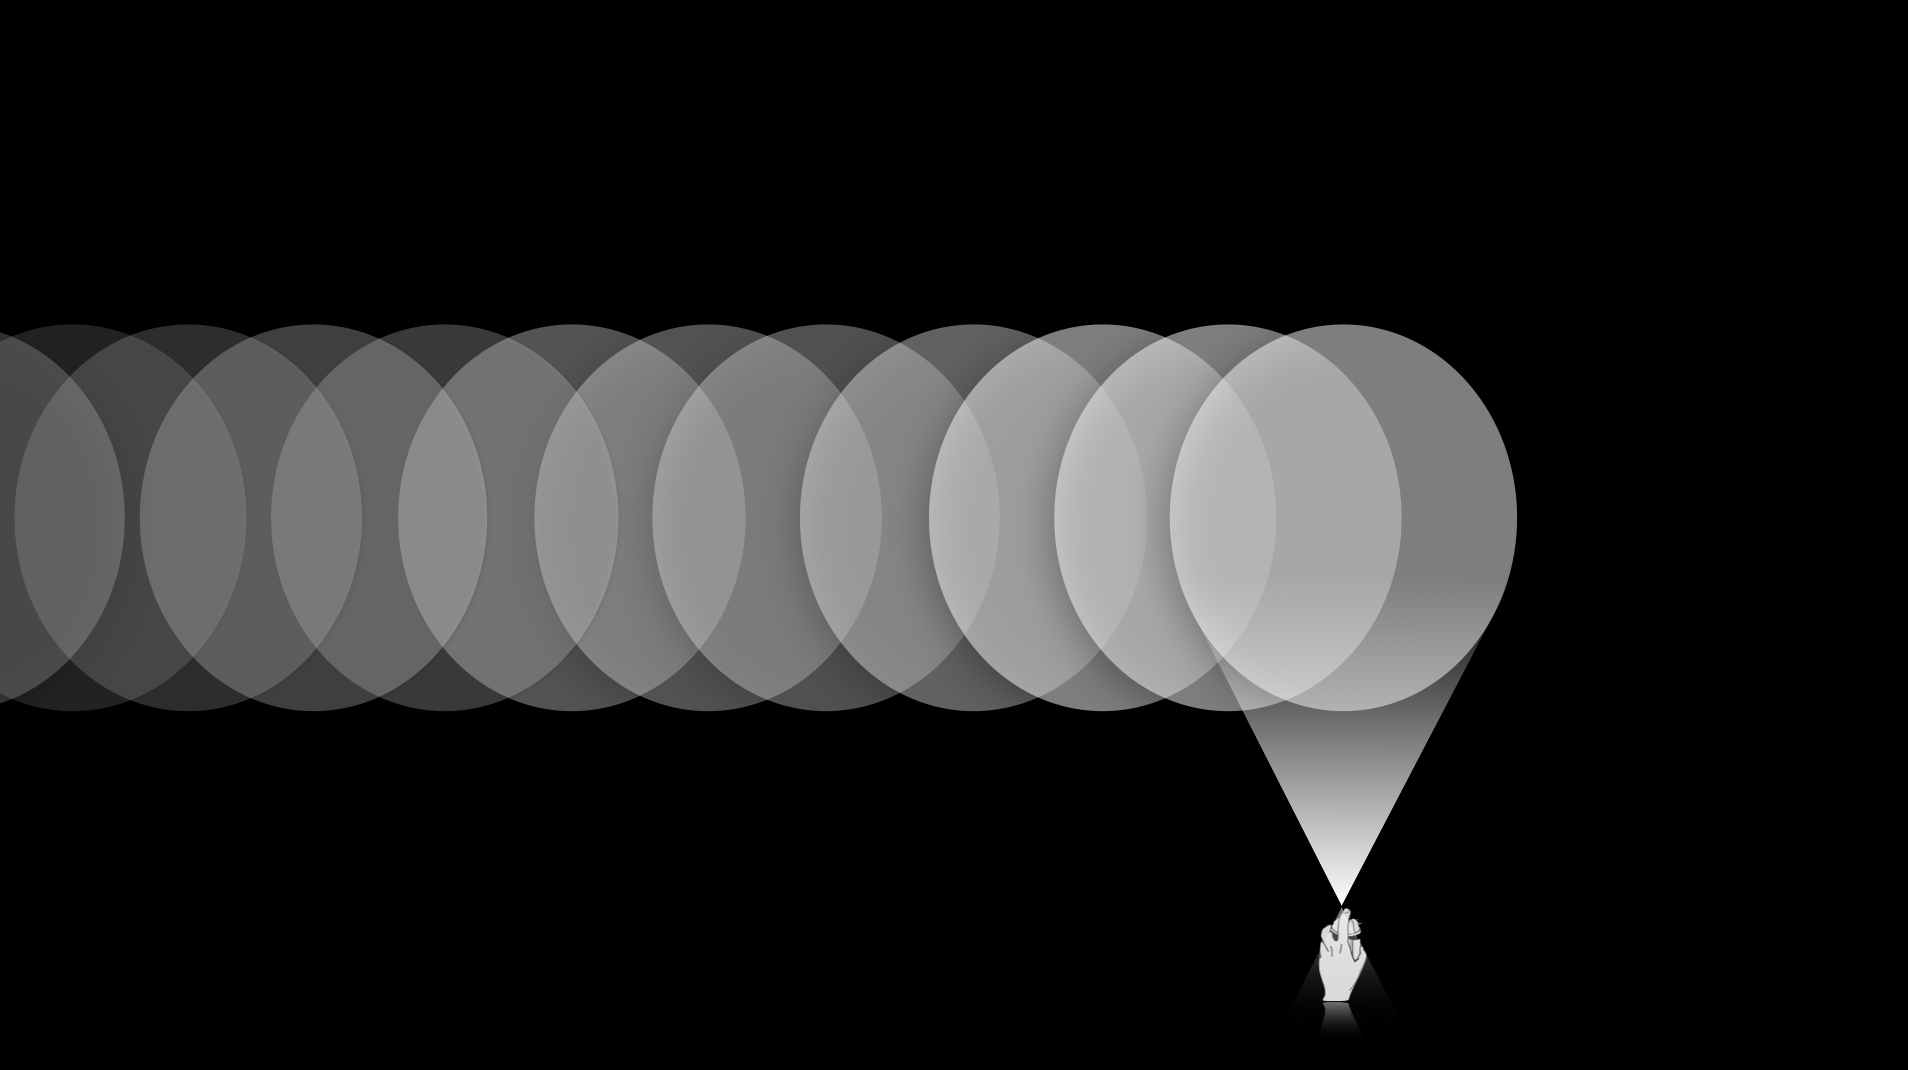
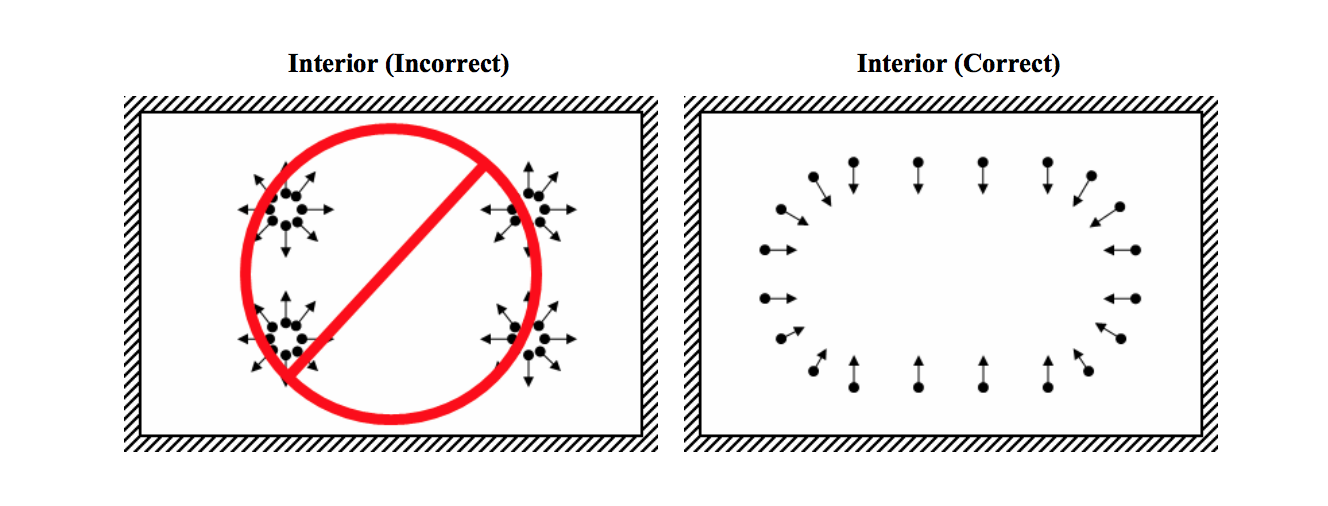
(1) Walk around an object in circular motion without moving the object. You can think about the movement as looking at a sculpture, walking around and taking in all the details with your camera.
Try to include everything in your frame without cropping the object.
(1) Walk around an object in circular motion without moving the object. You can think about the movement as looking at a sculpture, walking around and taking in all the details with your camera.
Try to include everything in your frame without cropping the object.
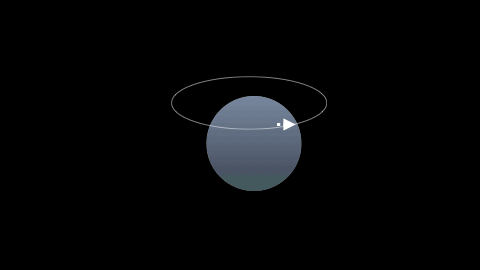
Remember we are going to stitch the photos together. So the photos should have overlaps. Think about stitching or fish scales.
To be more specific, the first photo and second photo should have at least 50-70% overlap.
To be more specific, the first photo and second photo should have at least 50-70% overlap.
(2) Objects with intricate contours or taller objects usually need a second round.
The second round of photos should overlap about 50% of the first round.
The second round of photos should overlap about 50% of the first round.
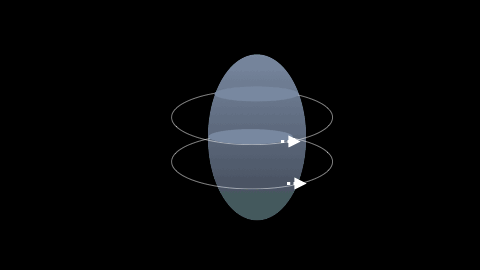
For these two rounds, the object should be entirely visible (not cropped)
(3) For the final step, zoom in to get close-up photos of the object.
For an object around the size of an apple, around 60-100 photos should be enough.
Here is an example from participant Daniel Jackson.
Here is an example from participant Daniel Jackson.
Environment Capture:
The goal is to paint the full picture of the space, in circular motions.
(1) Take your camera, oriented in a landscape position. Imagine this camera sprays out paint; you are trying to cover all the details in the room with paint.
The goal is to paint the full picture of the space, in circular motions.
(1) Take your camera, oriented in a landscape position. Imagine this camera sprays out paint; you are trying to cover all the details in the room with paint.
(2) Start at a position where you can take in most of your space. Then, take a baby step to your side, and take another photo. With each baby step, take another photo, and so on.
(3) Keep following the wall to paint in all details. Try to follow a sequence (try not to jump from one side to another). Your camera movement is like a spatula scraping the edges of the inside of a mixing bowl, with the mixing bowl being our room. If you scrape thoroughly you can get all the details.
(4) Once you cover all the walls, you will end up where you started. Repeat this several times from different angles if needed.
(6) Paint in more details of individual objects in the space.
(4) Once you cover all the walls, you will end up where you started. Repeat this several times from different angles if needed.
(6) Paint in more details of individual objects in the space.
 (
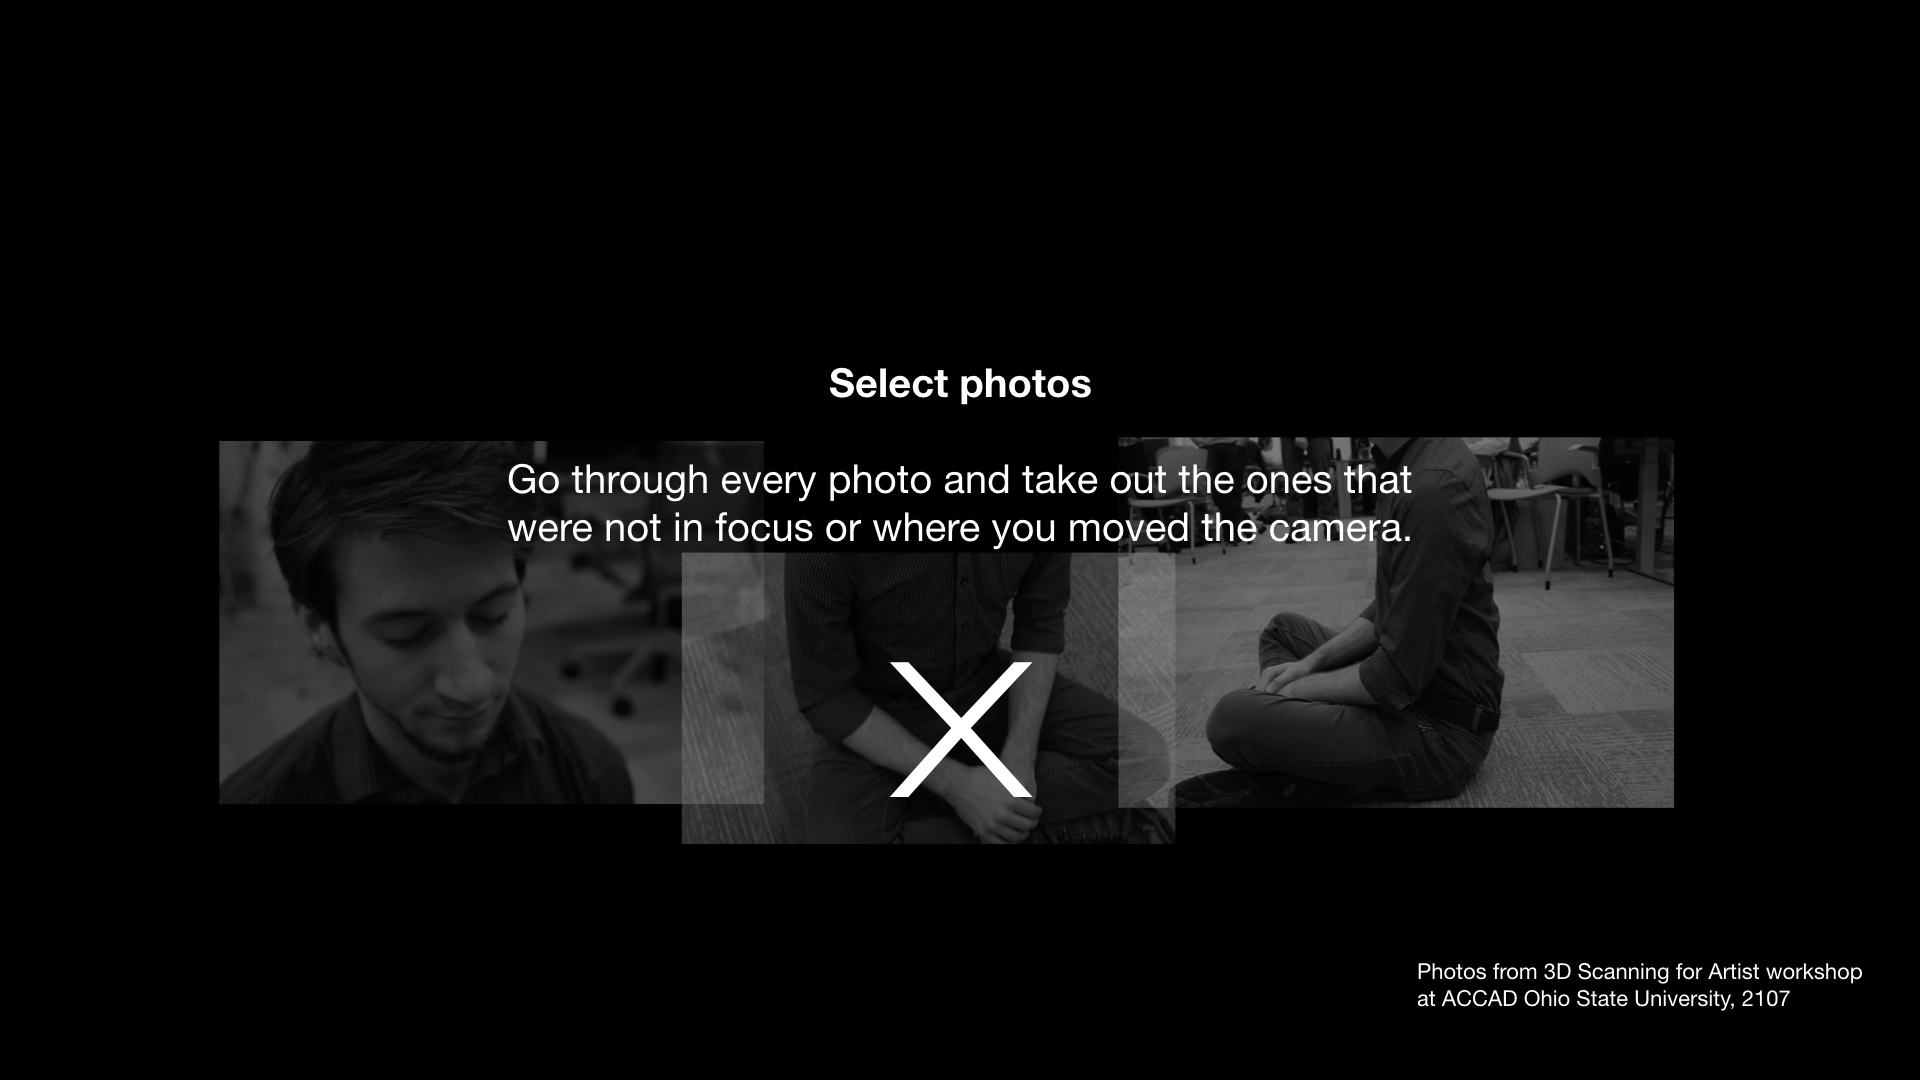
(Select Photos
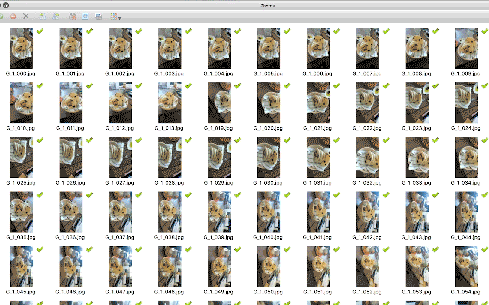
Go through every photo, deleting the ones that are not in focus or that are blurry.
Go through every photo, deleting the ones that are not in focus or that are blurry.
Tutorial (click to zoom)
Agisoft Metashape
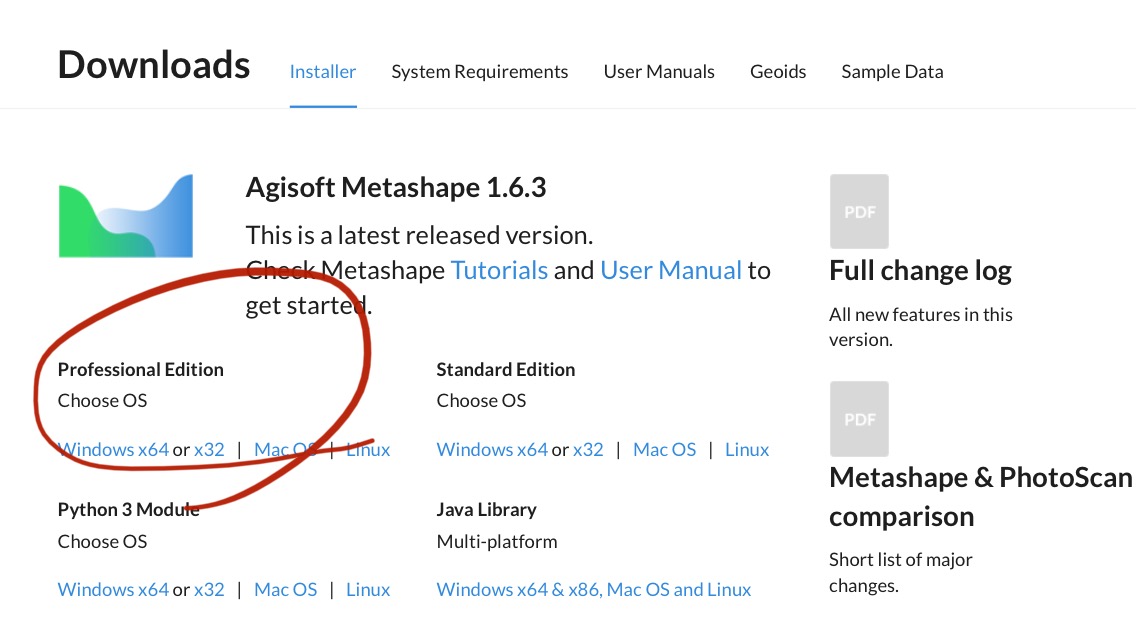
Download the professional edition by clicking on the Apple or Windows icon under Professional Edition (the trial offers the professional edition, but standard edition would work too).
To activate the full version for 30 days for save and export features, go to Request Trial.
Download the professional edition by clicking on the Apple or Windows icon under Professional Edition (the trial offers the professional edition, but standard edition would work too).
To activate the full version for 30 days for save and export features, go to Request Trial.
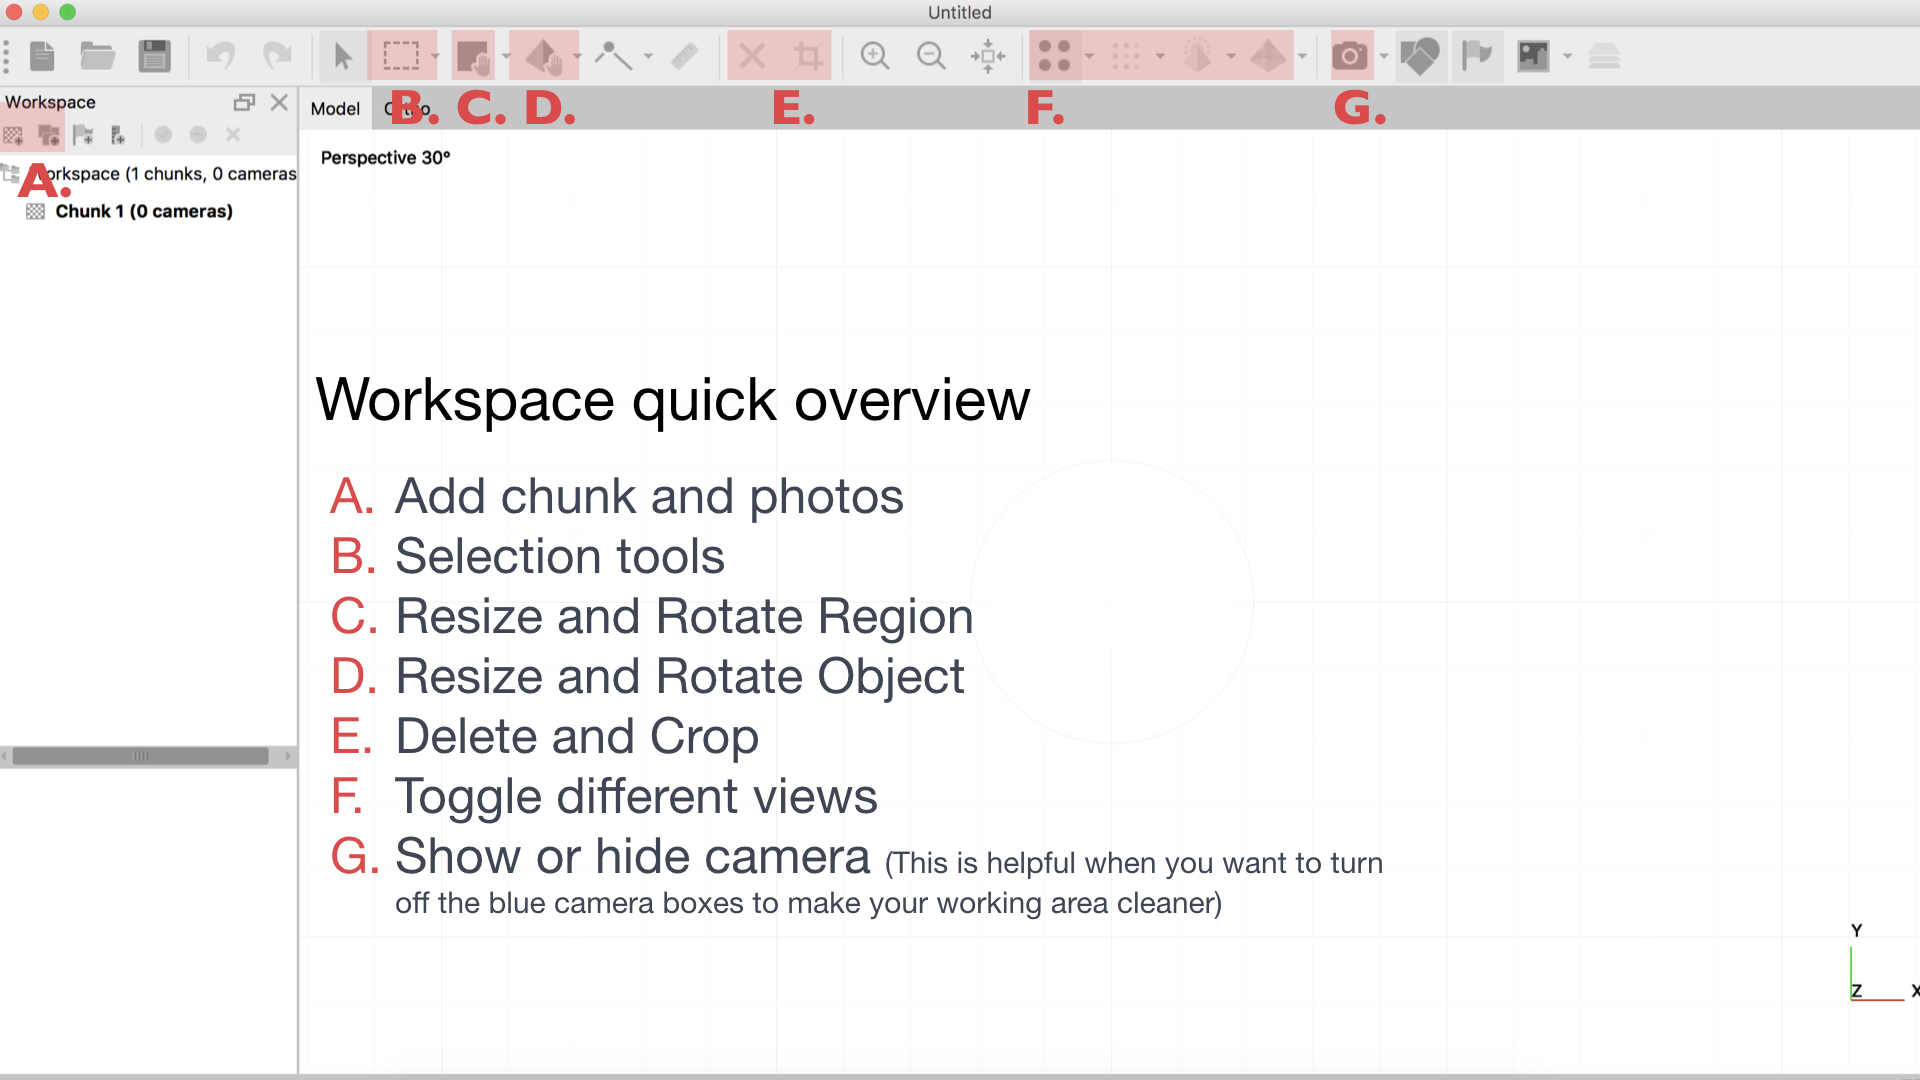
Workspace Overview
A. Add chunk and photos
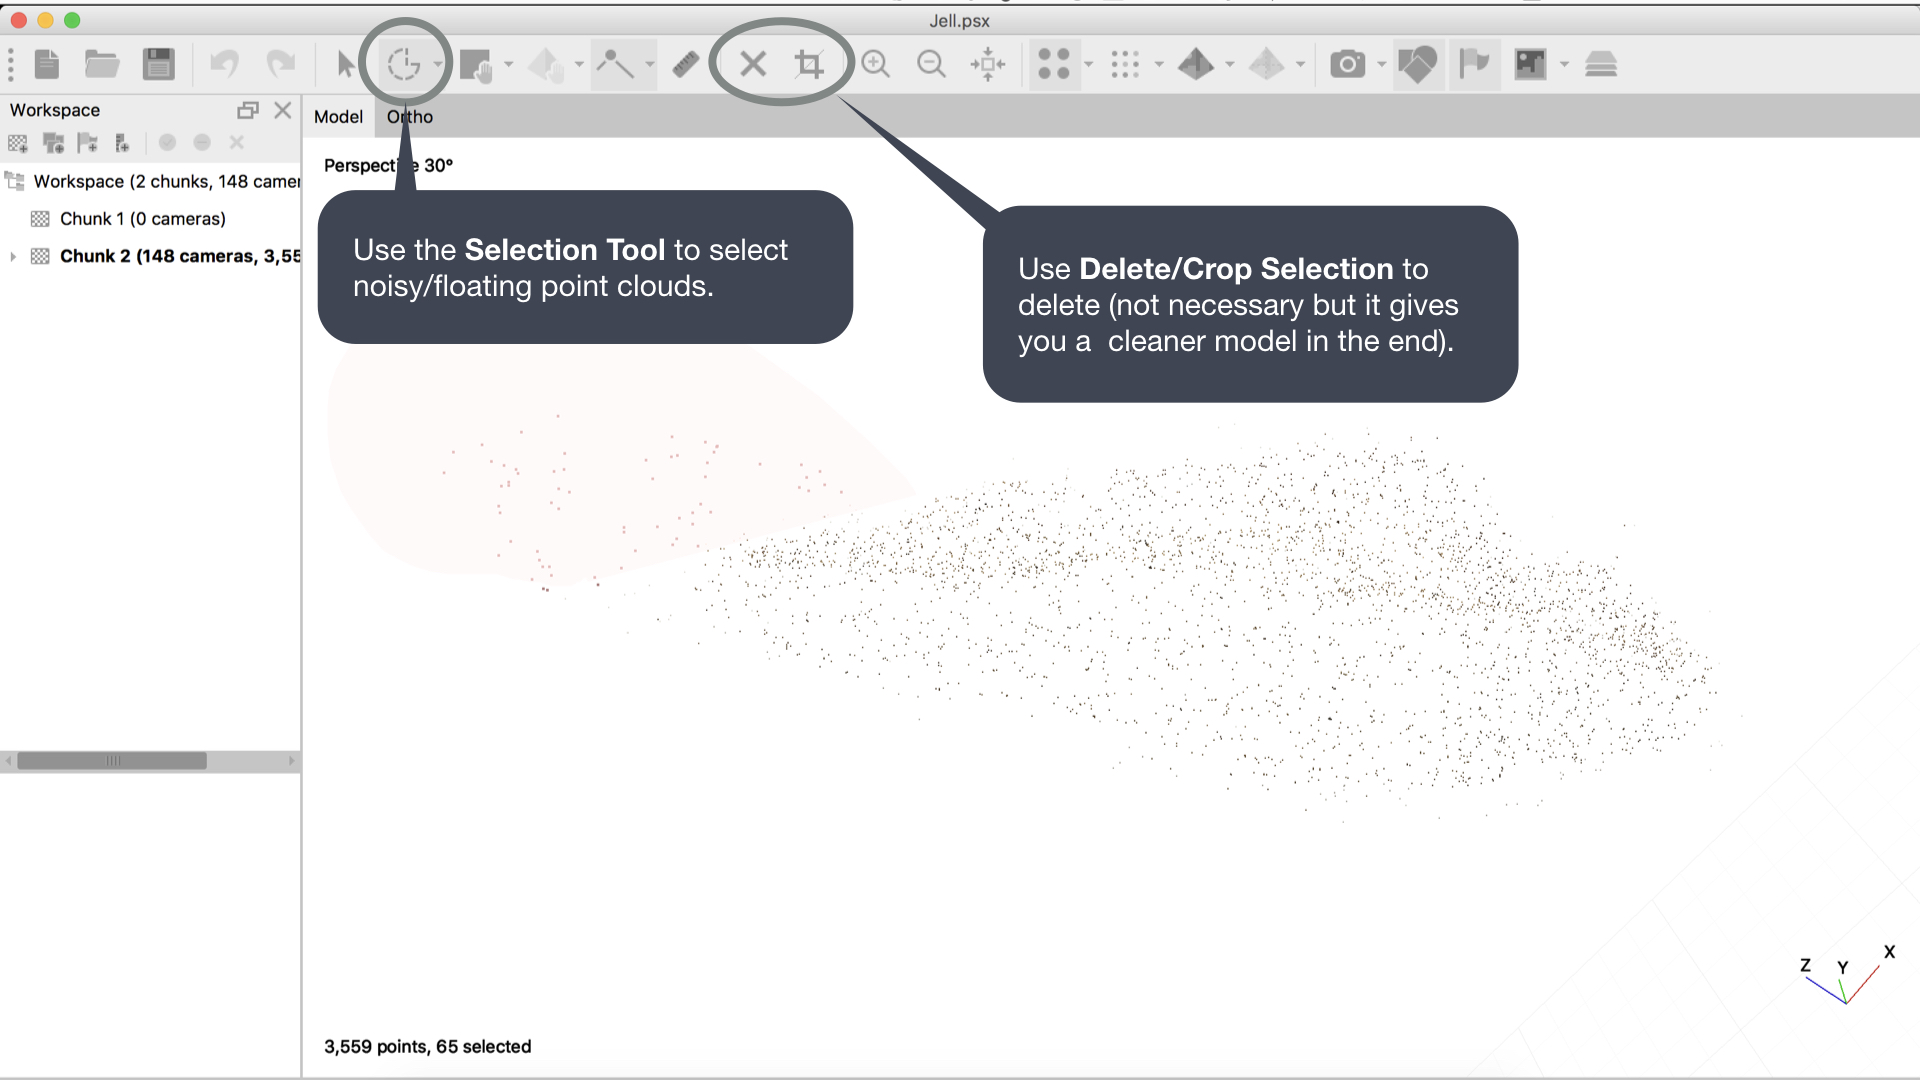
B. Selection tools
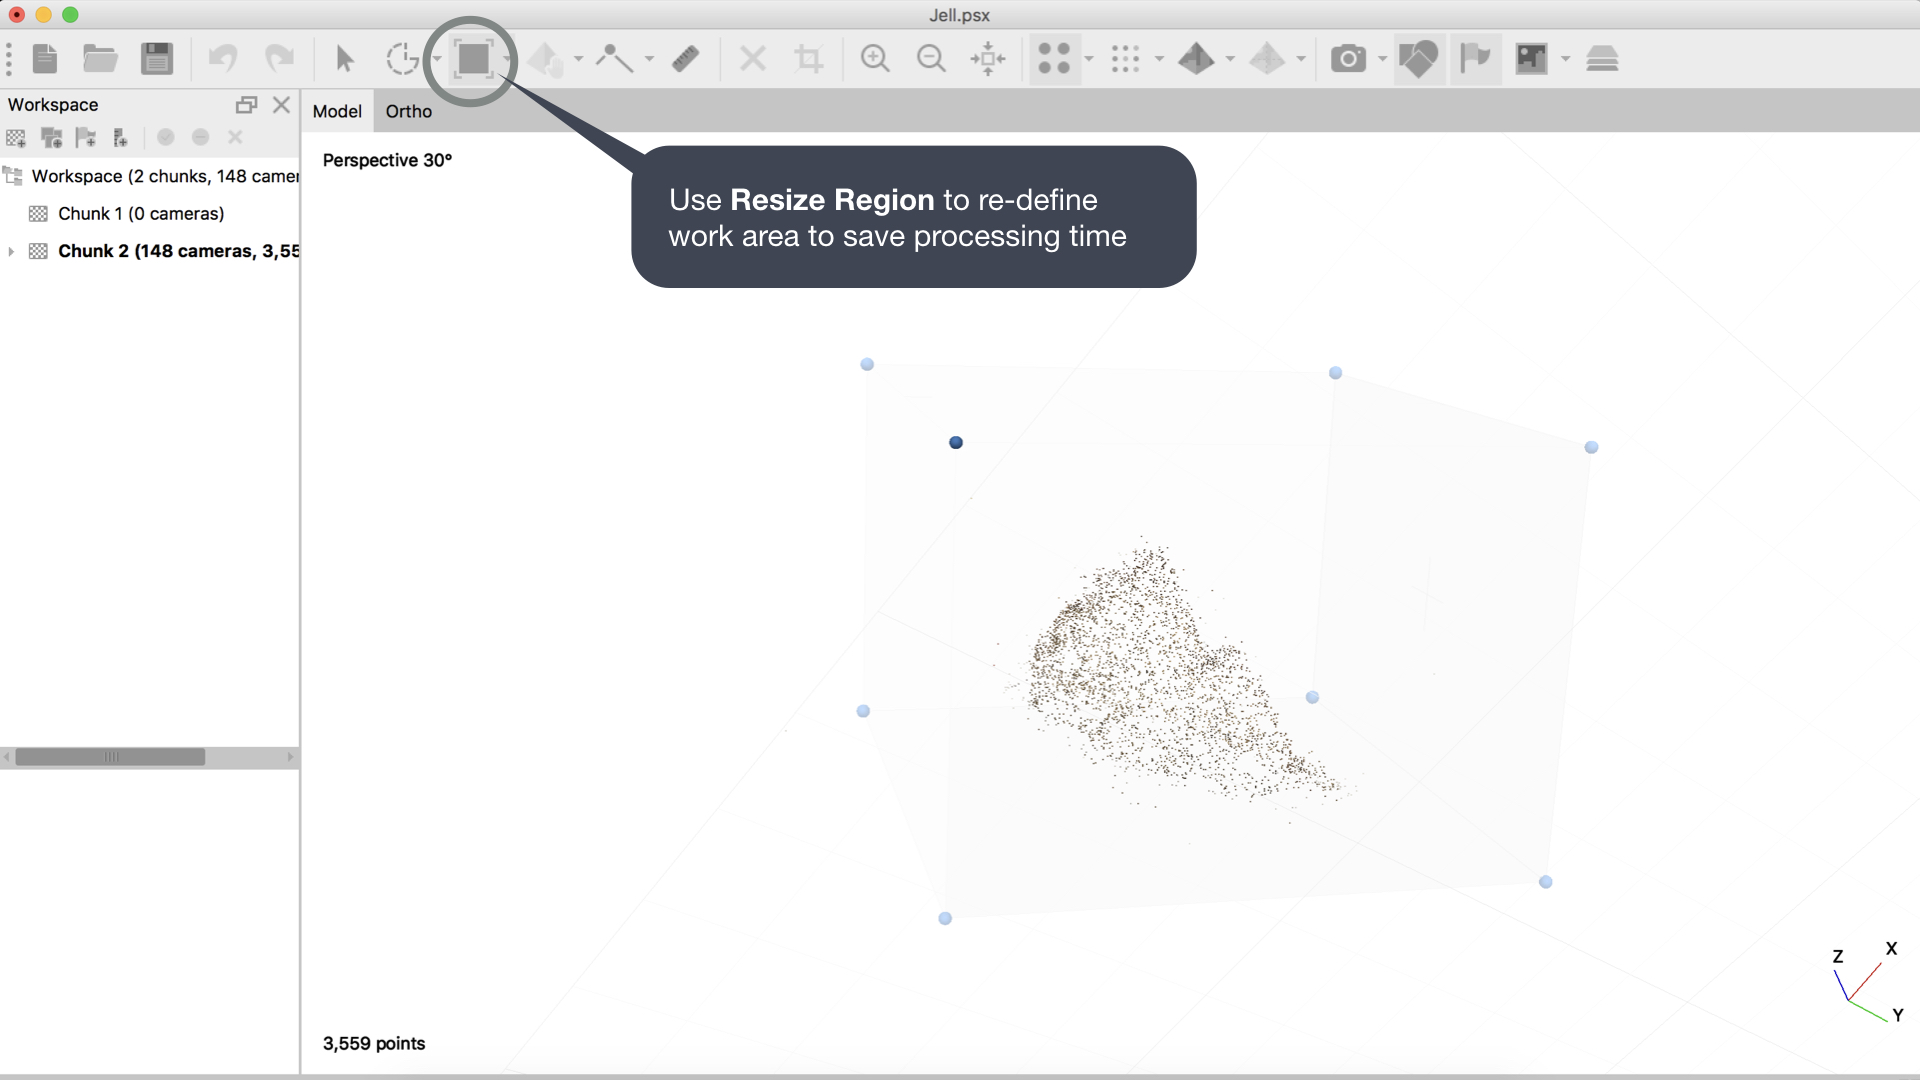
C. Resize and Rotate Region
D. Resize and Rotate Object
E. Delete and Crop
F. Toggle for different views
G. Show or hide camera (This is helpful when you want to turn off the blue camera boxes to make your working area cleaner)
A. Add chunk and photos
B. Selection tools
C. Resize and Rotate Region
D. Resize and Rotate Object
E. Delete and Crop
F. Toggle for different views
G. Show or hide camera (This is helpful when you want to turn off the blue camera boxes to make your working area cleaner)
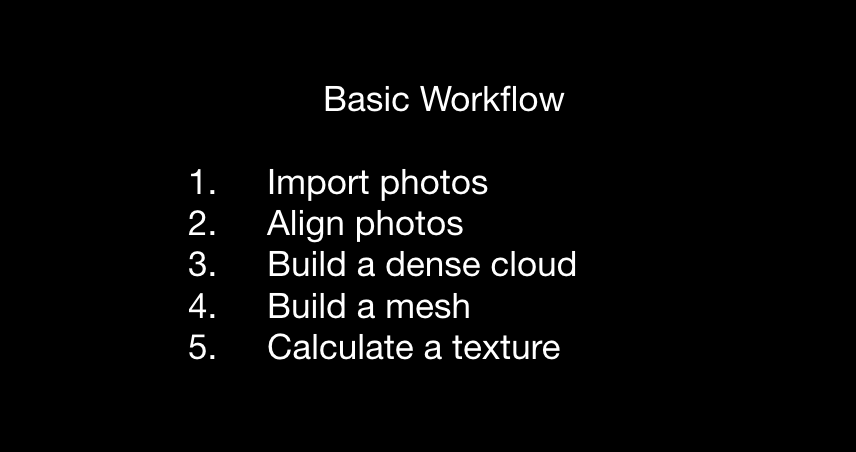
Basic Workflow
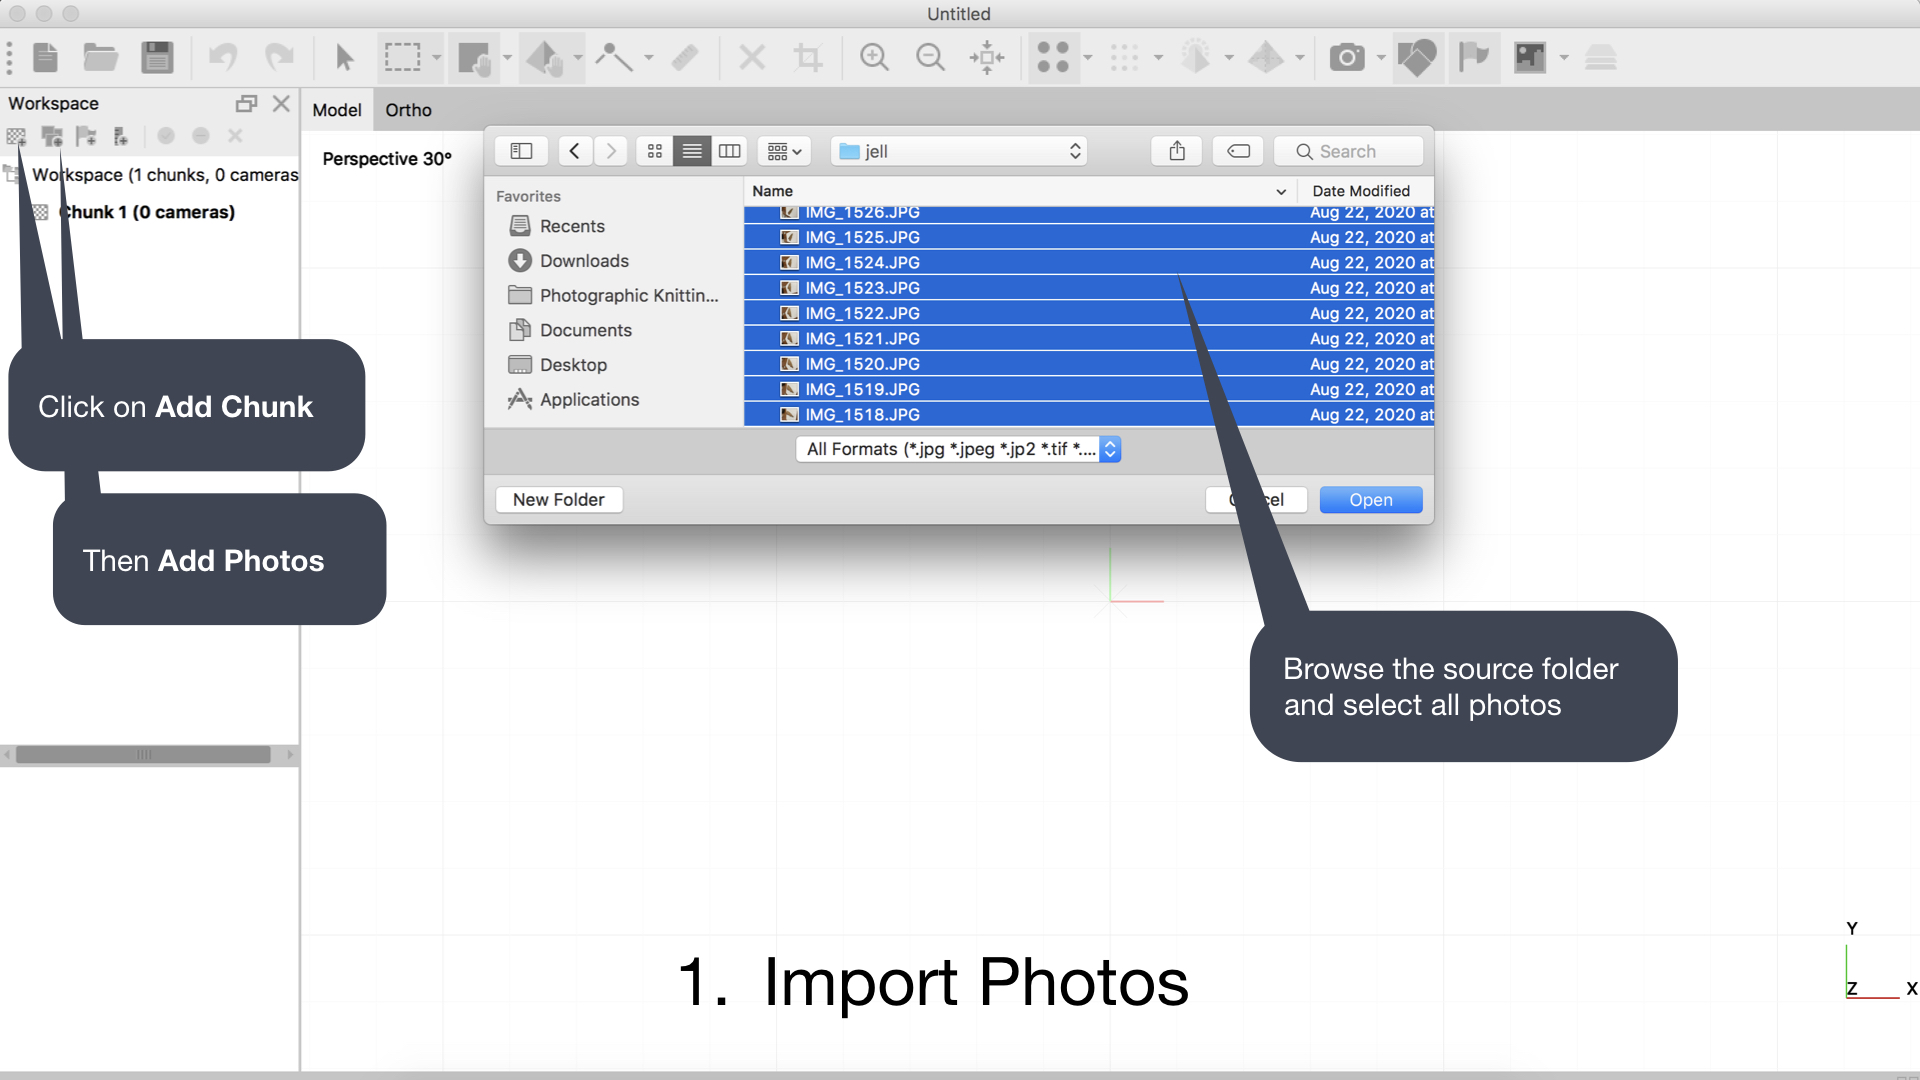
(1) Import Photos
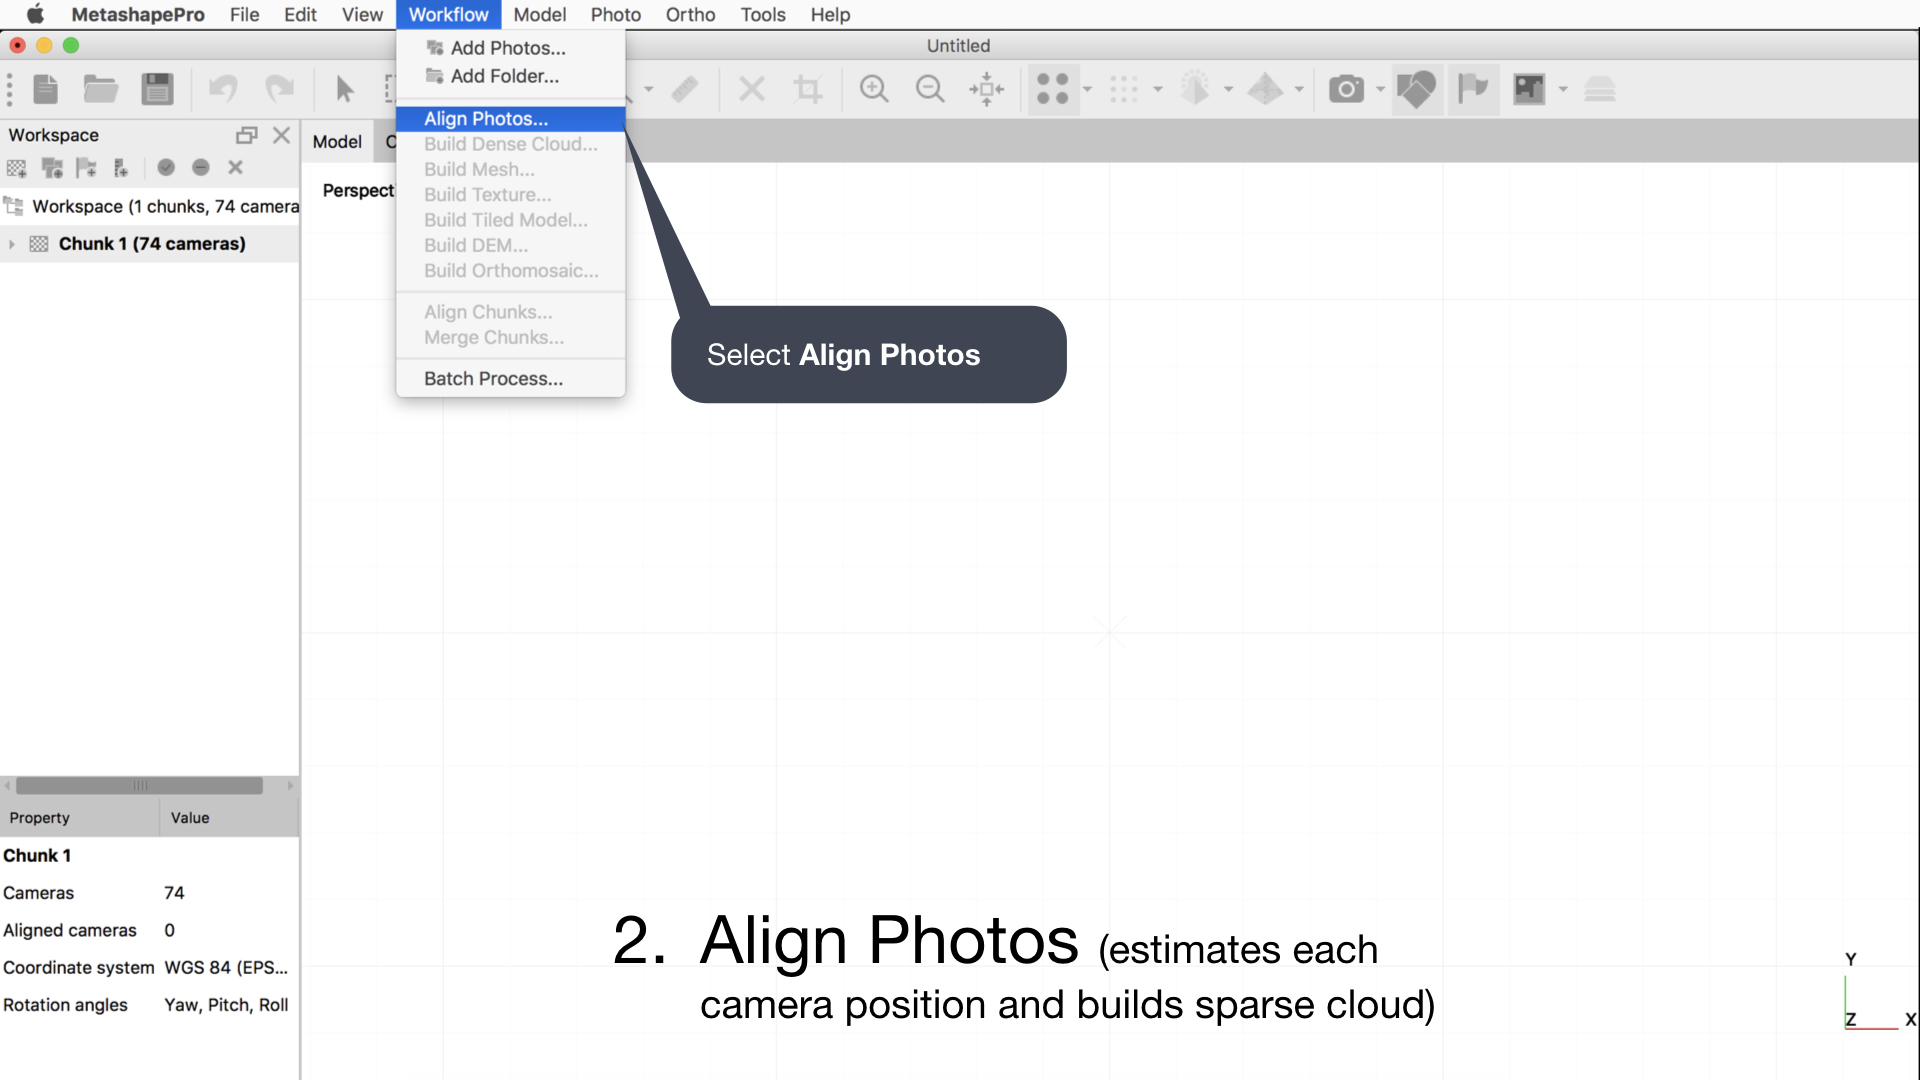
(2) Stitch/Align photos
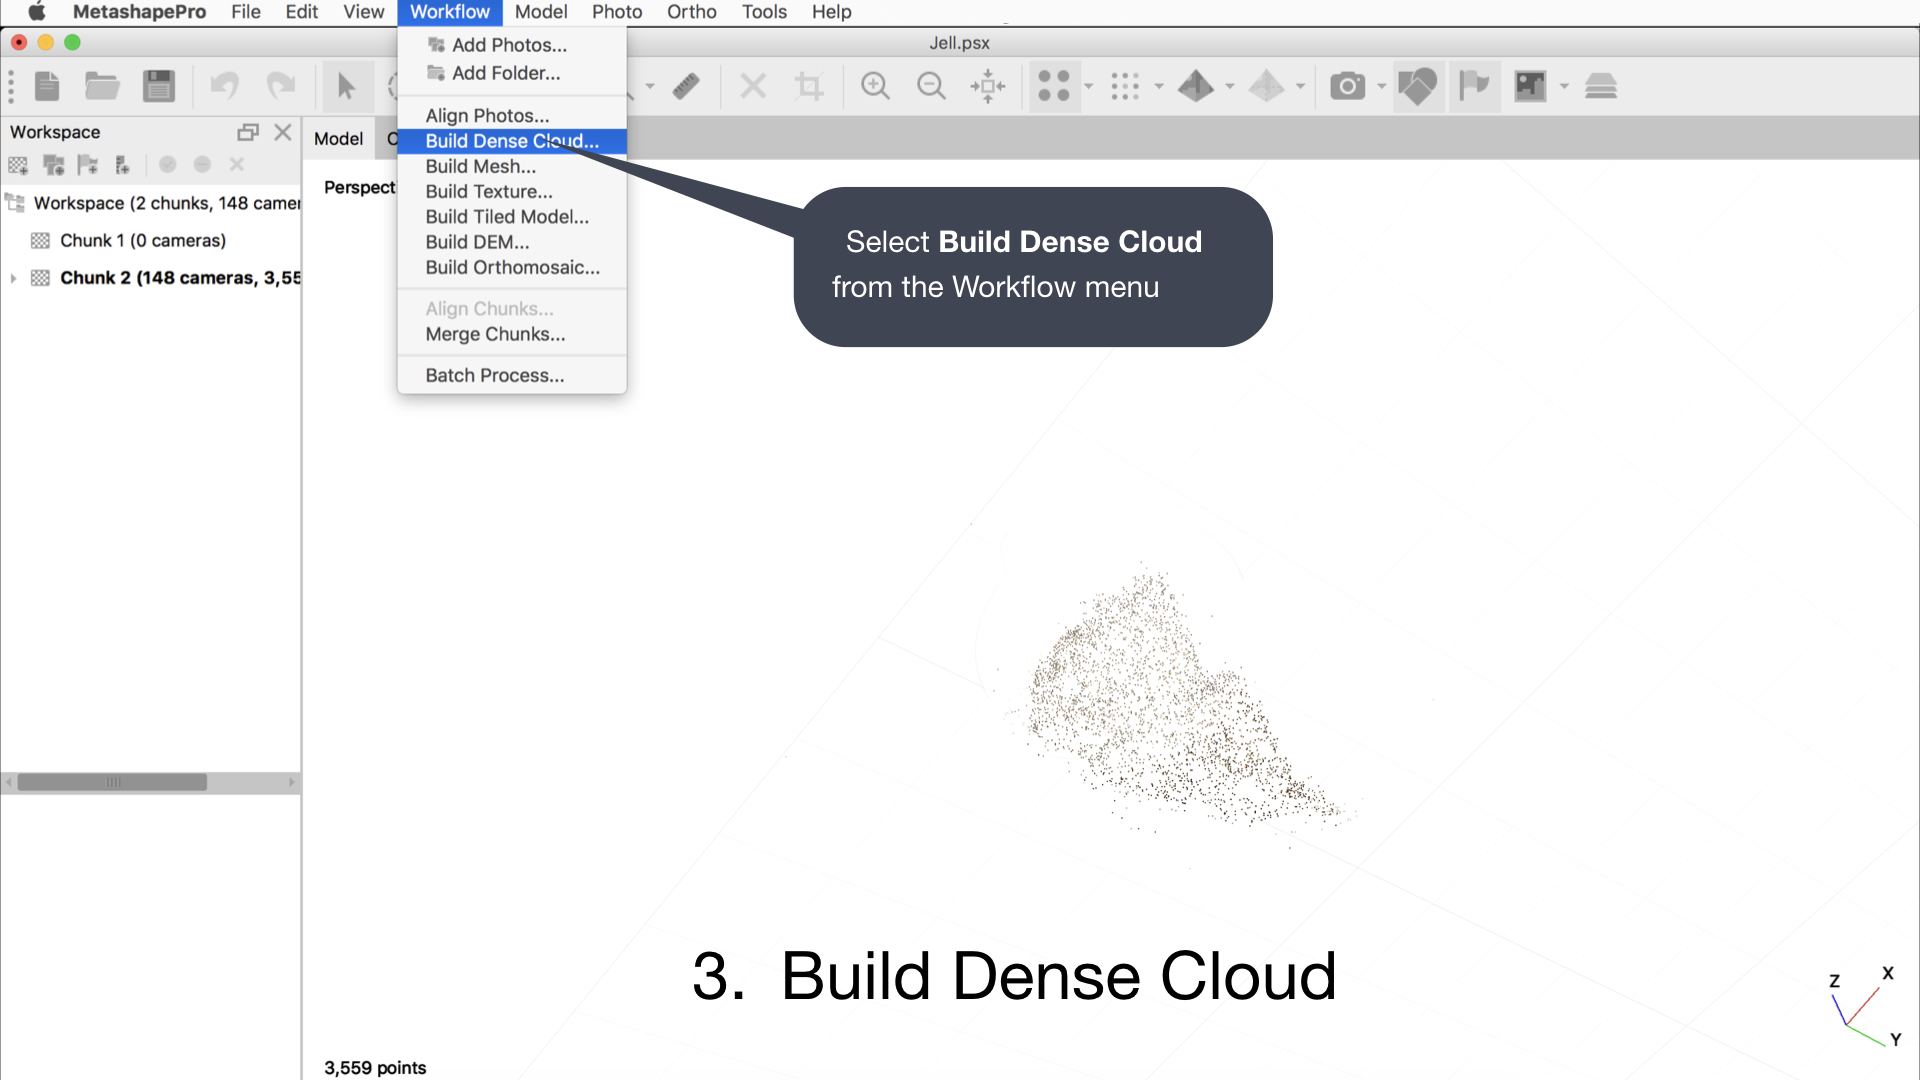
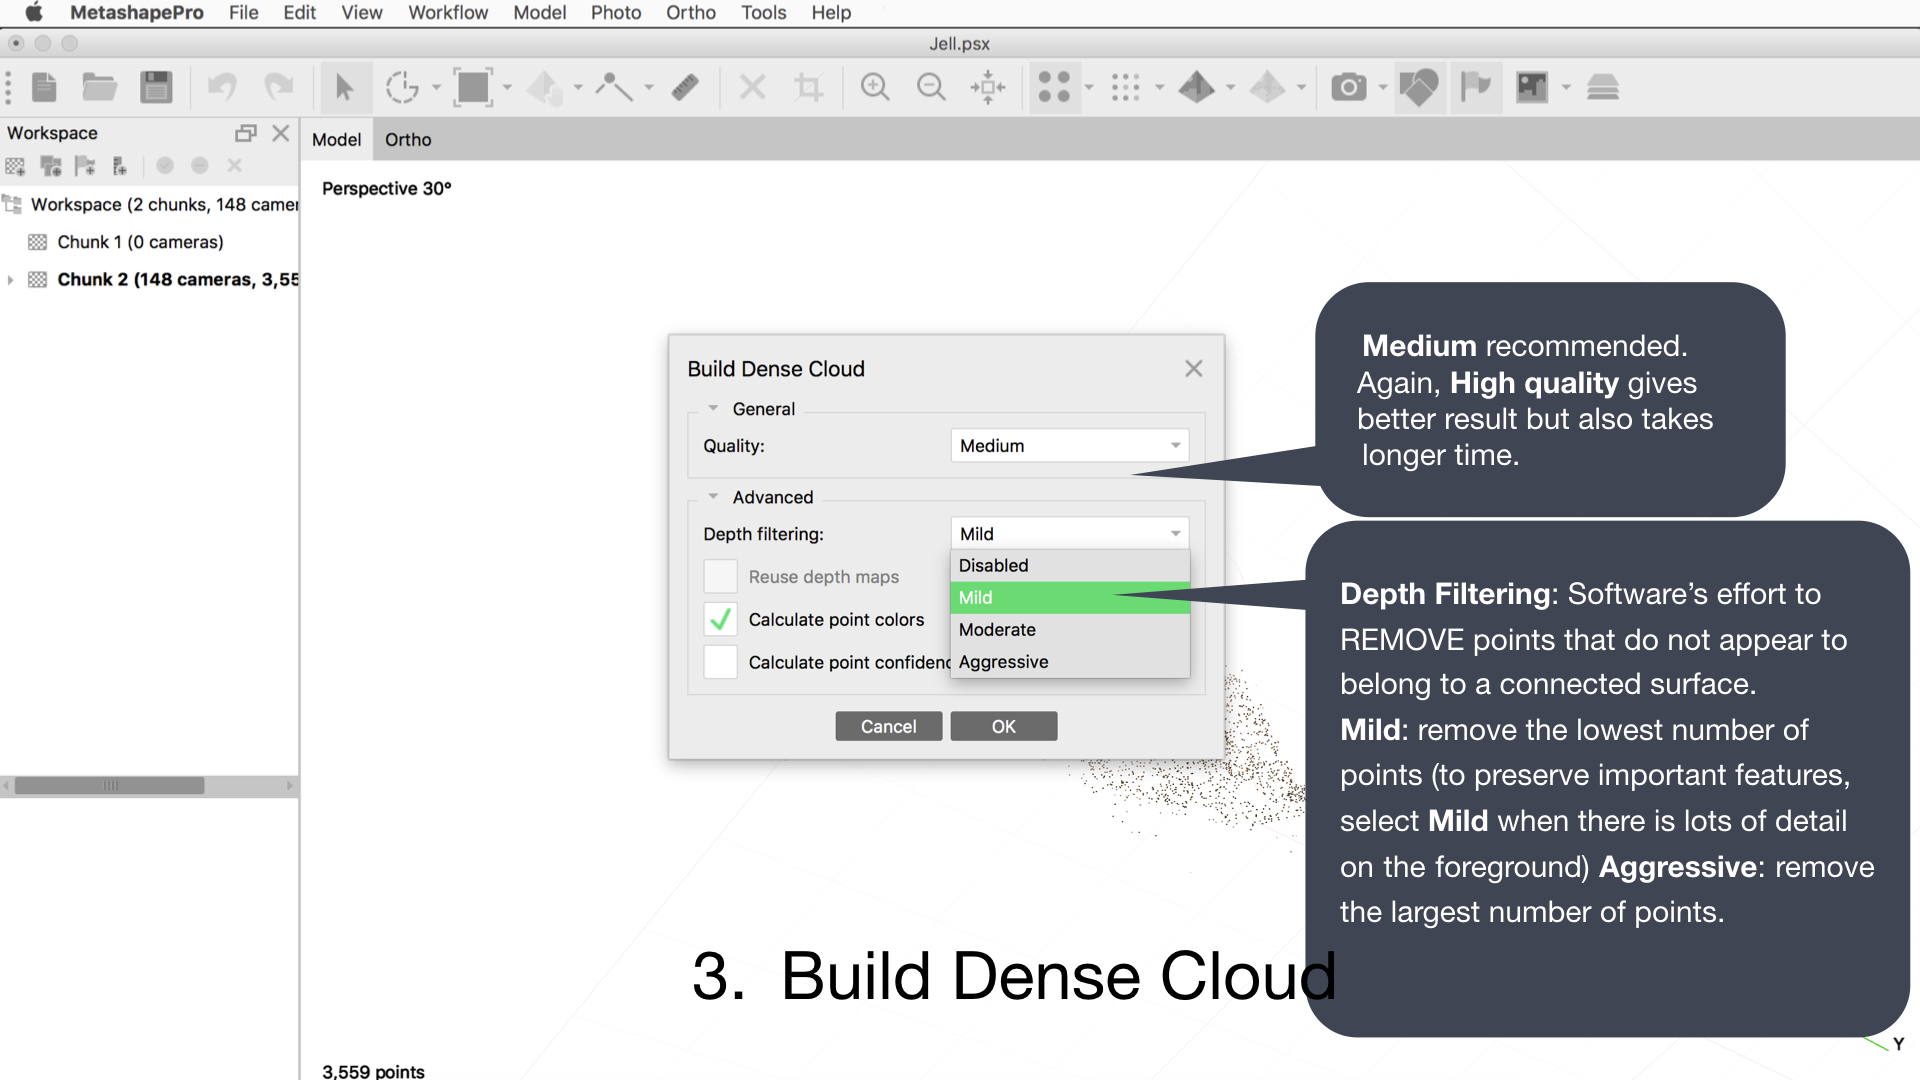
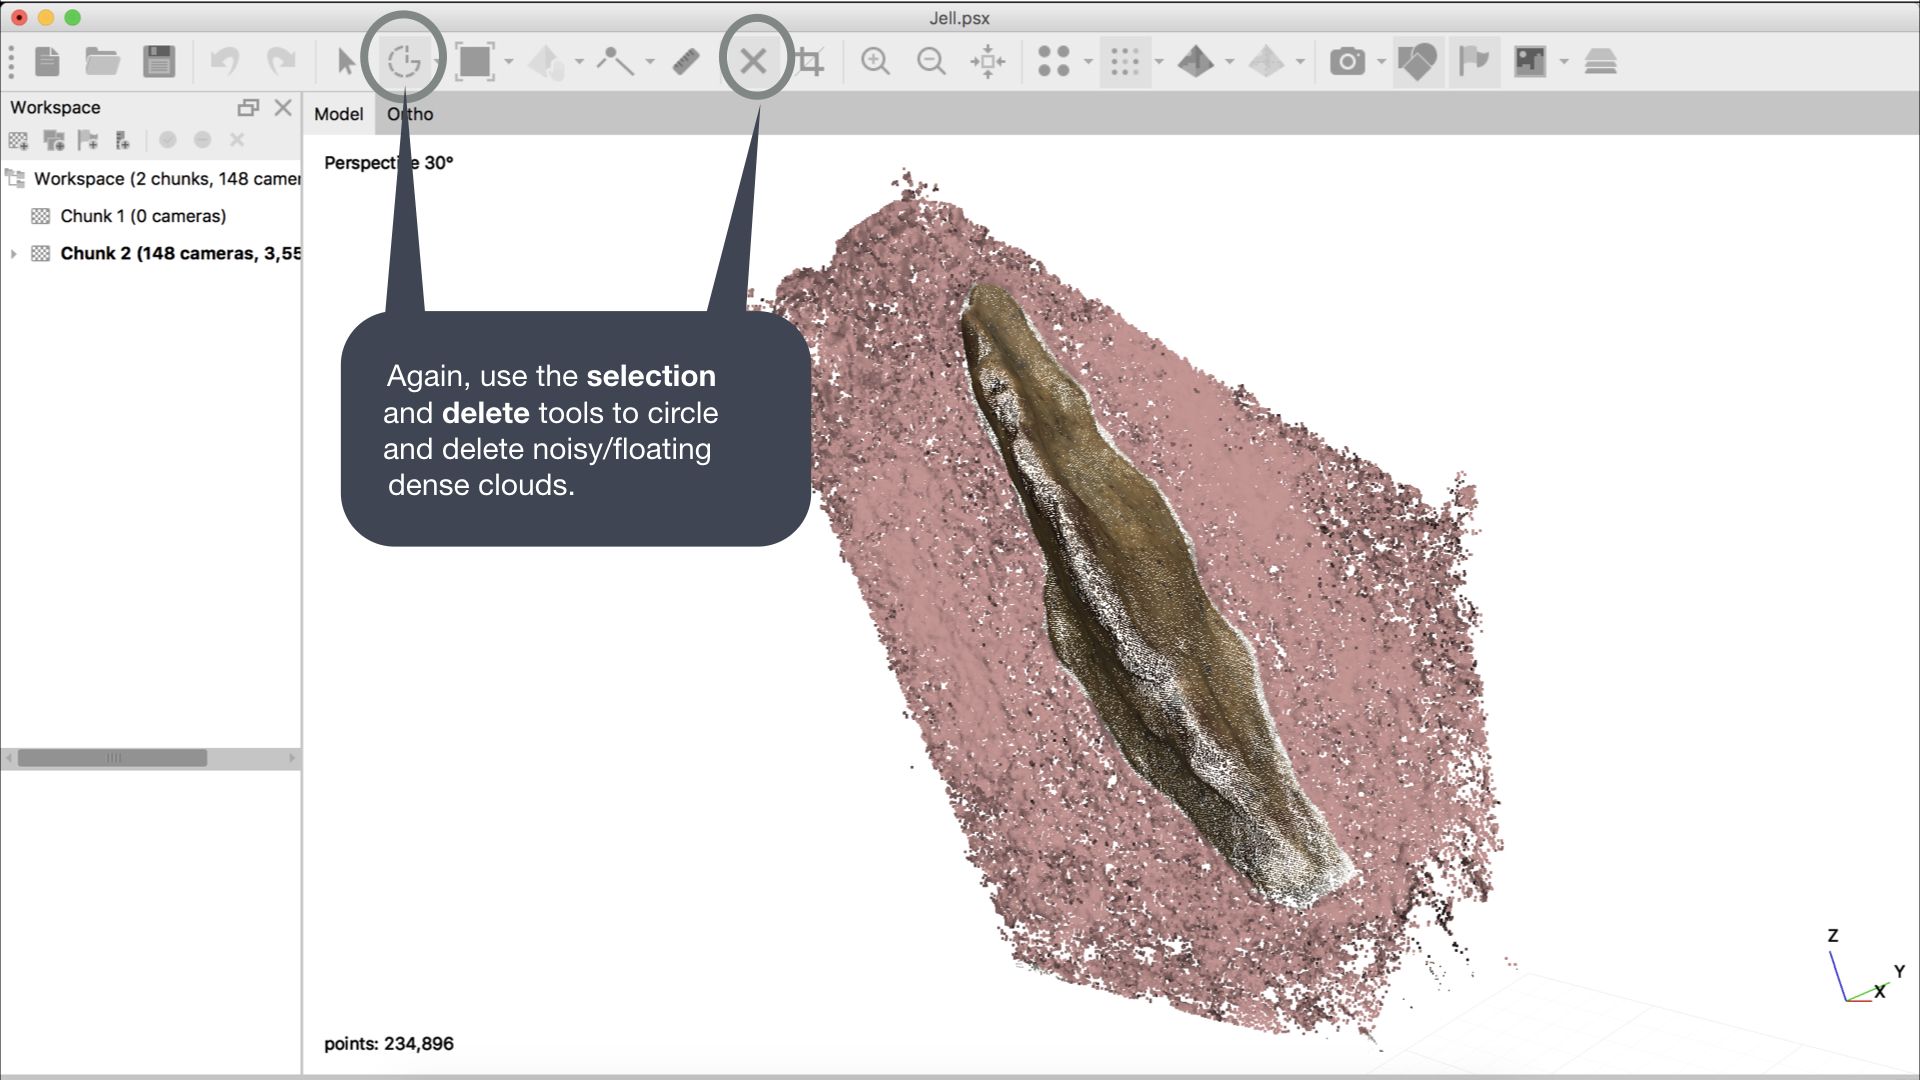
(3) Build a dense cloud
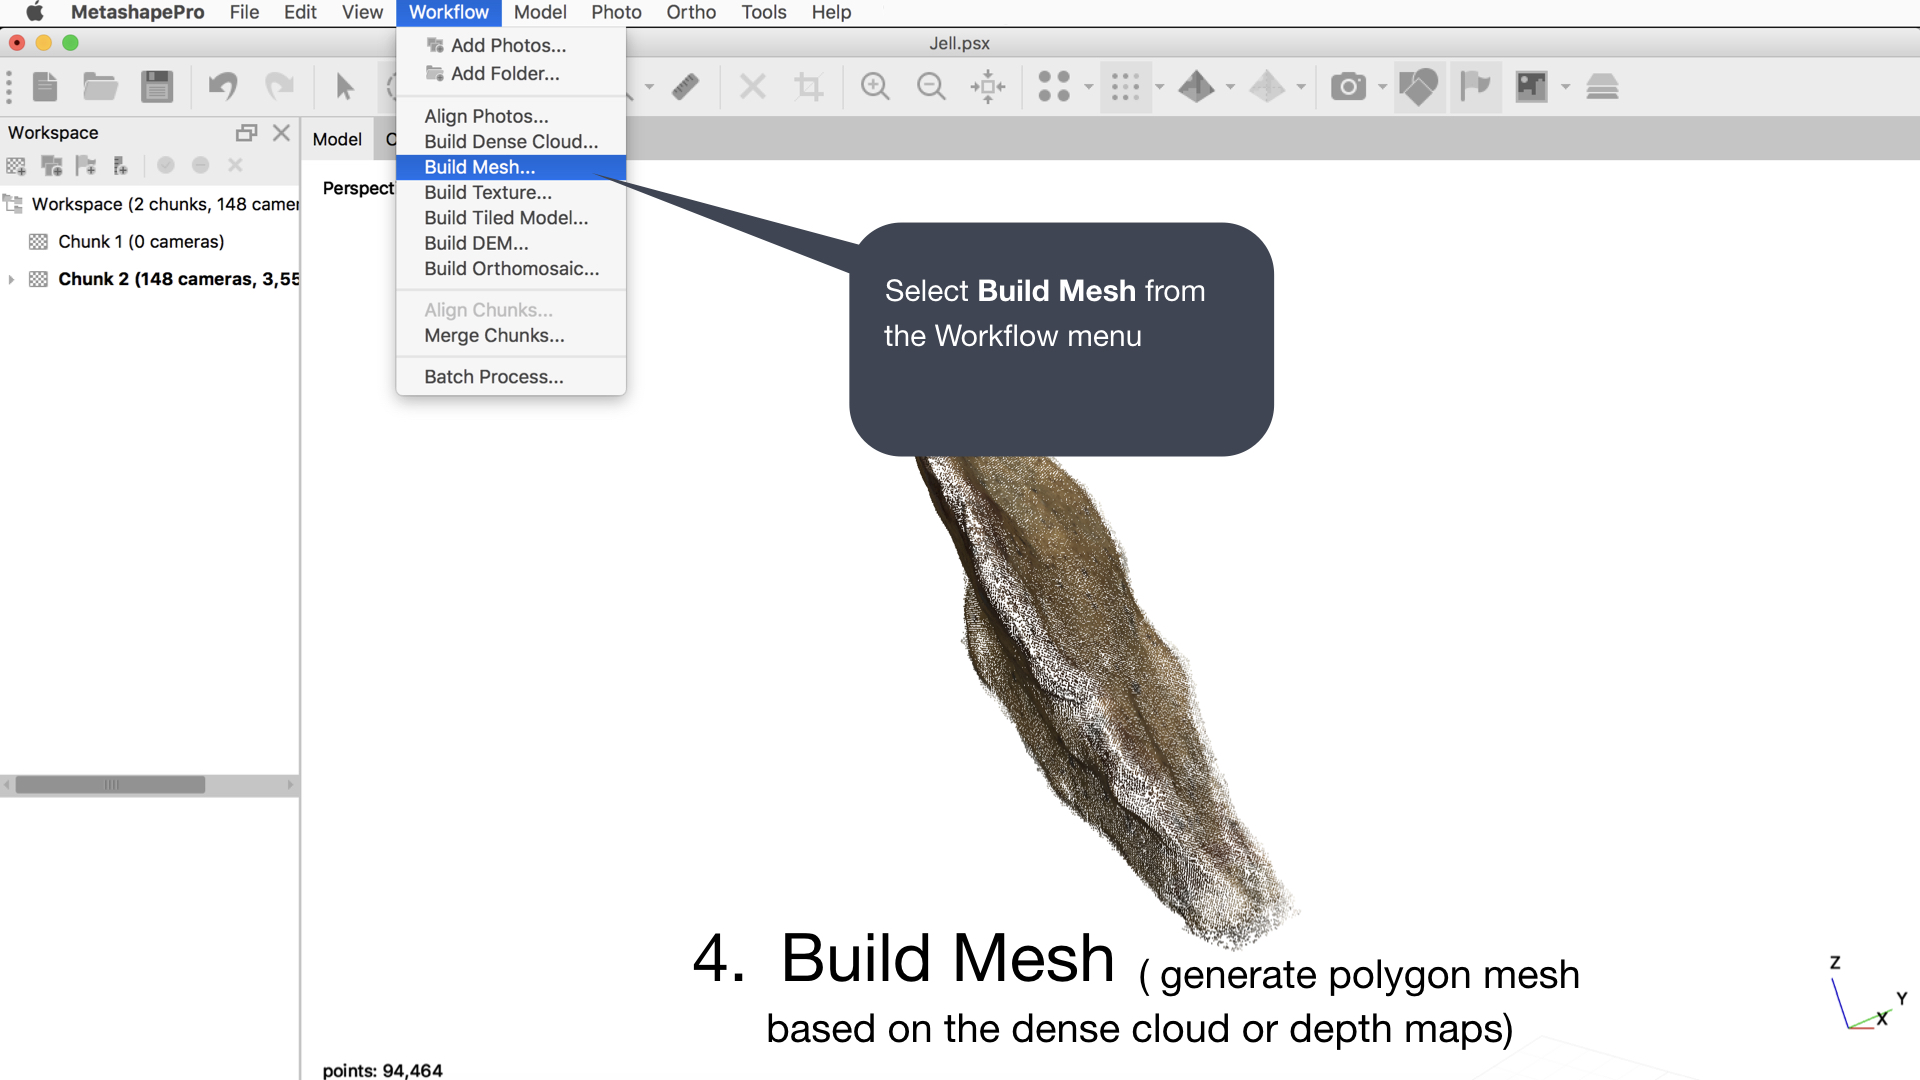
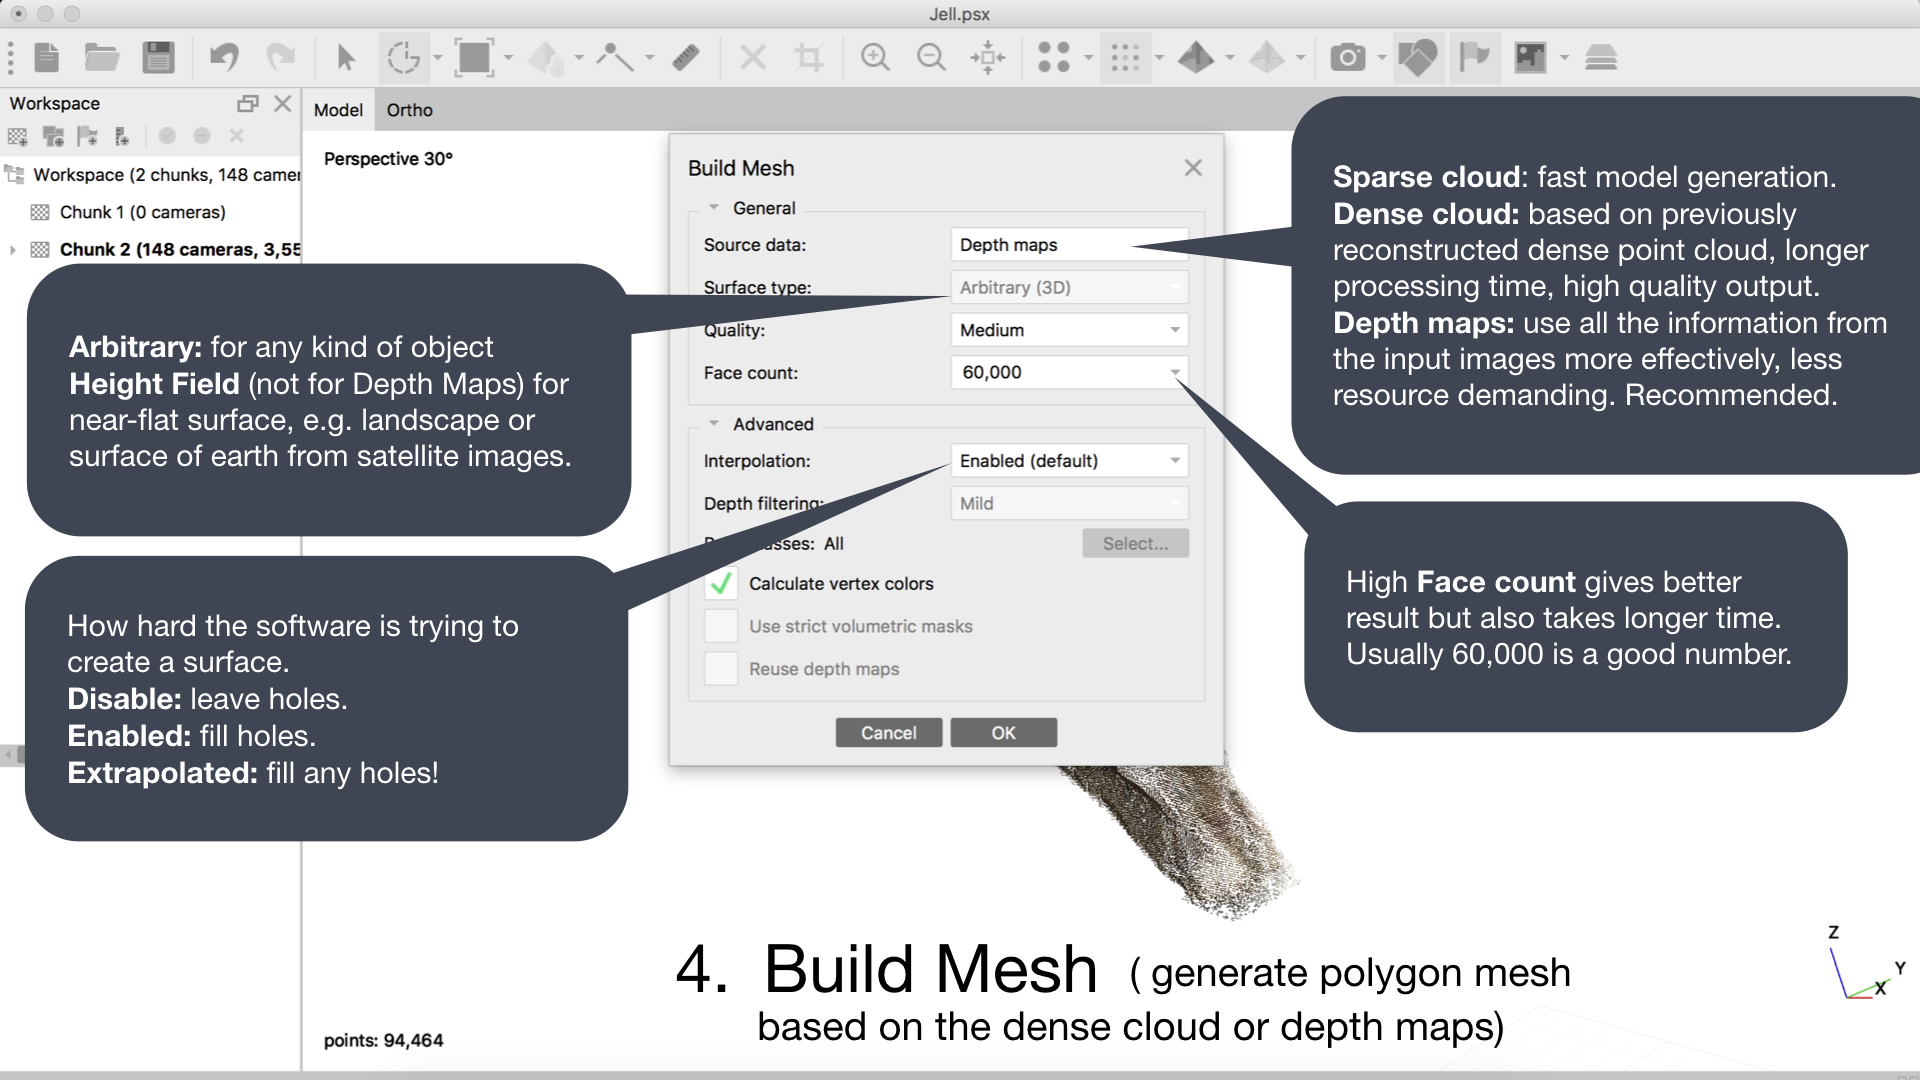
(4) Build mesh/body
(5) Build texture/skin
(1) Import Photos
(2) Stitch/Align photos
(3) Build a dense cloud
(4) Build mesh/body
(5) Build texture/skin
(1) Import Photos
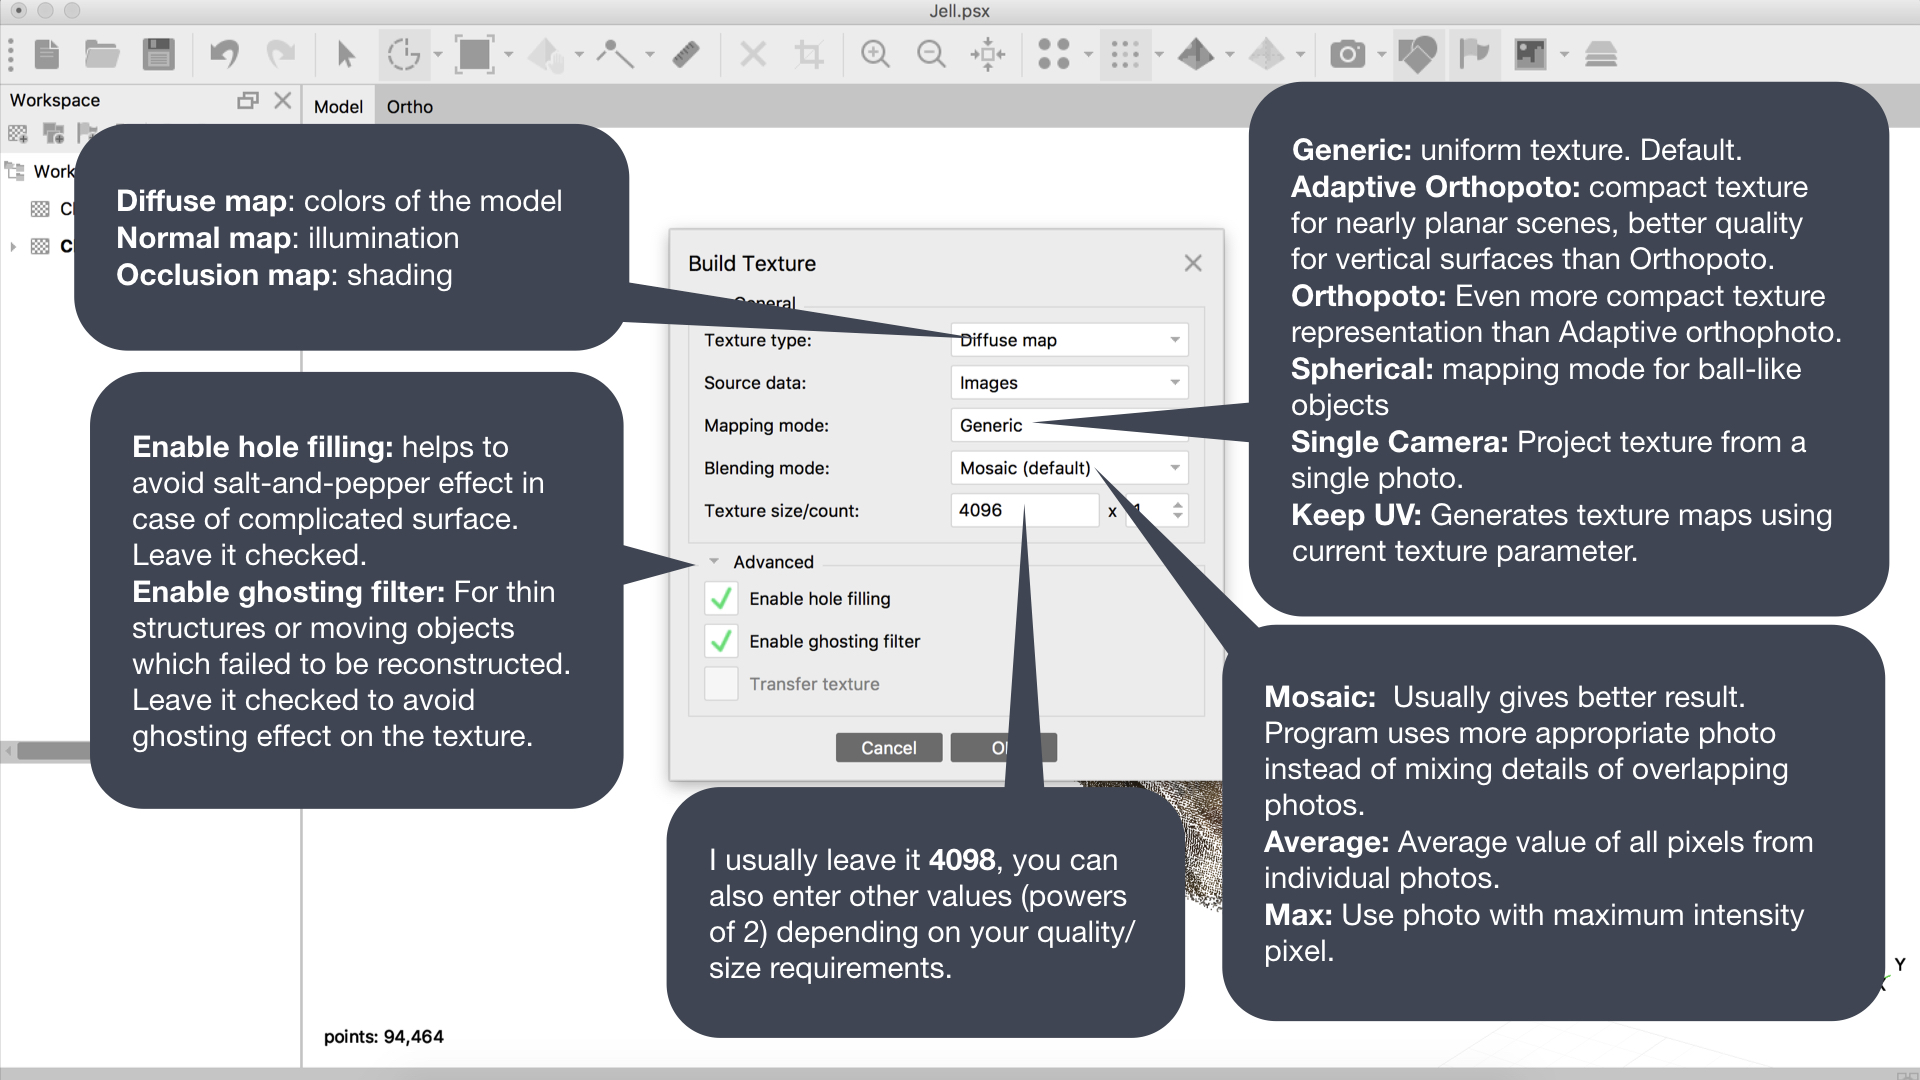
*Recommended parameters shown in screenshots.
Further information shown in text bubble.
*Recommended parameters shown in screenshots.
Further information shown in text bubble.
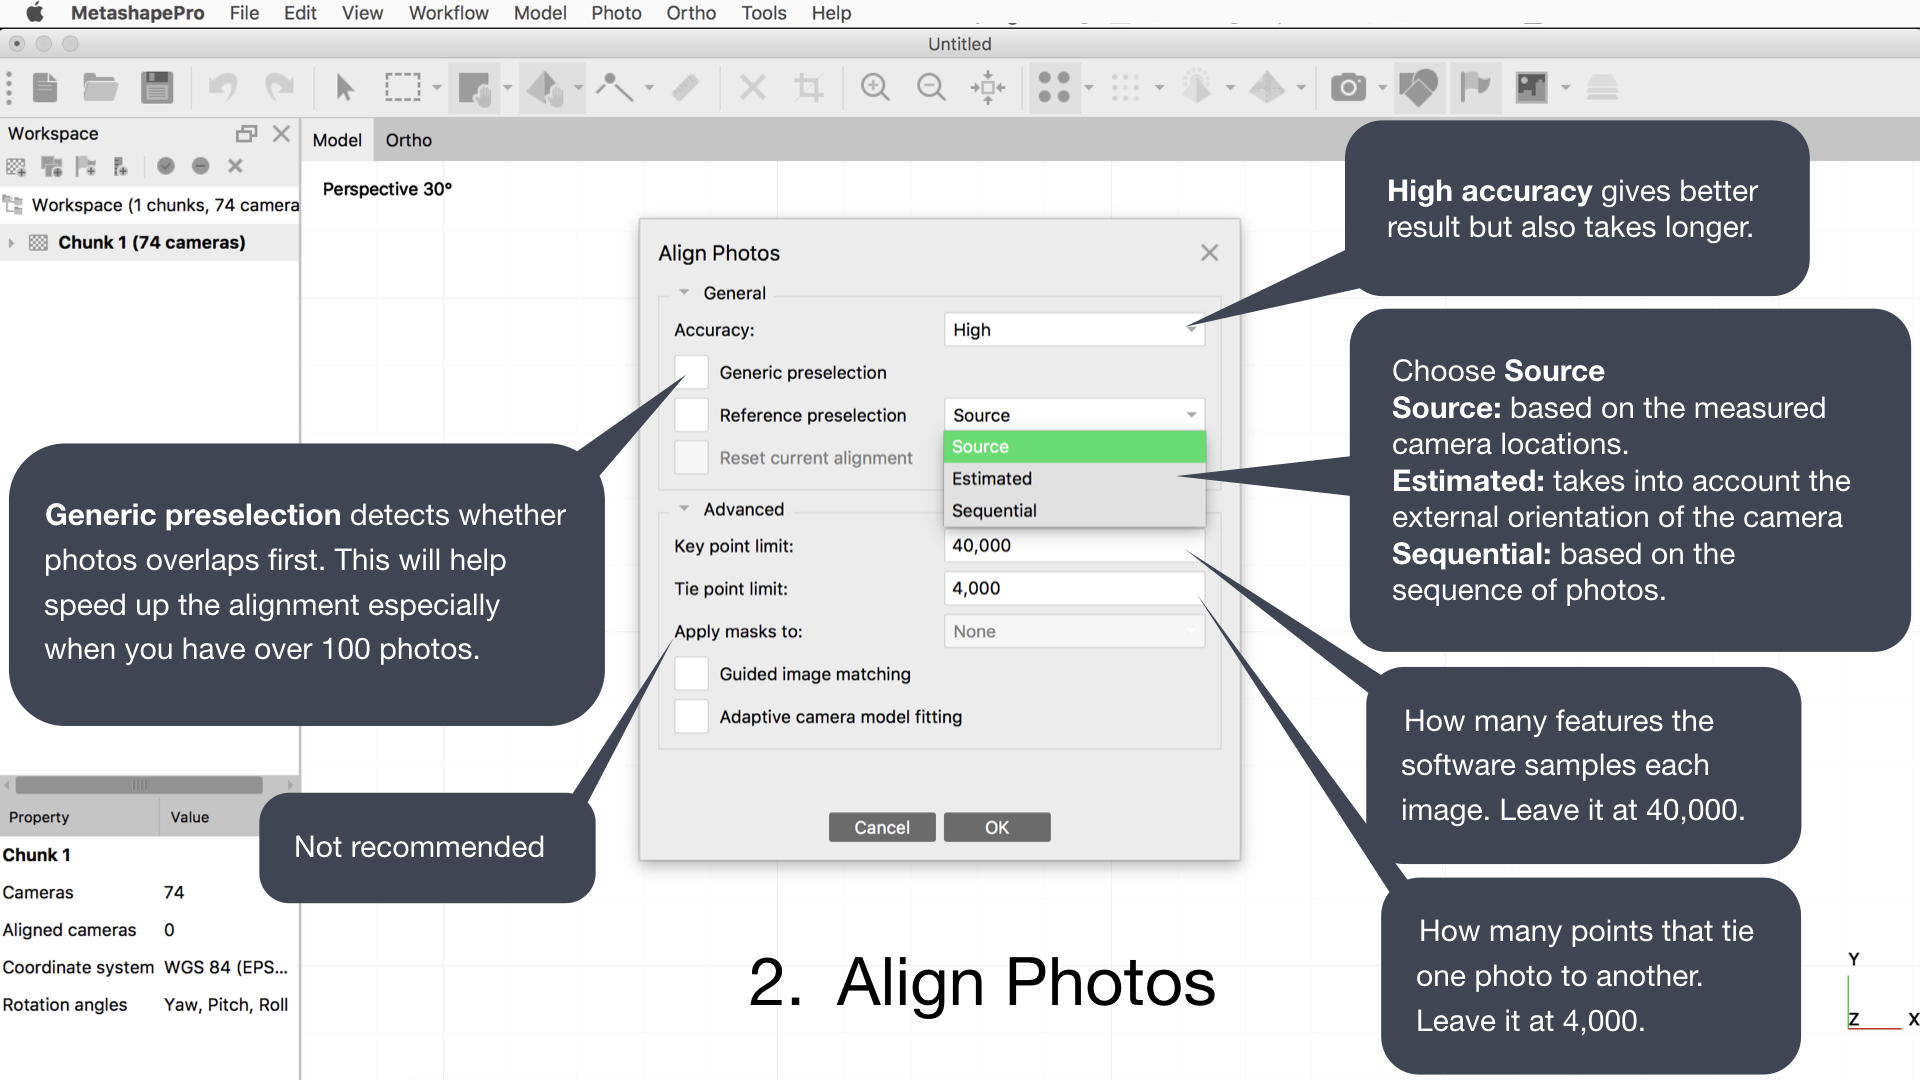
(2) Stitch/Align photos
(3) Build dense cloud
(4) Build mesh/body
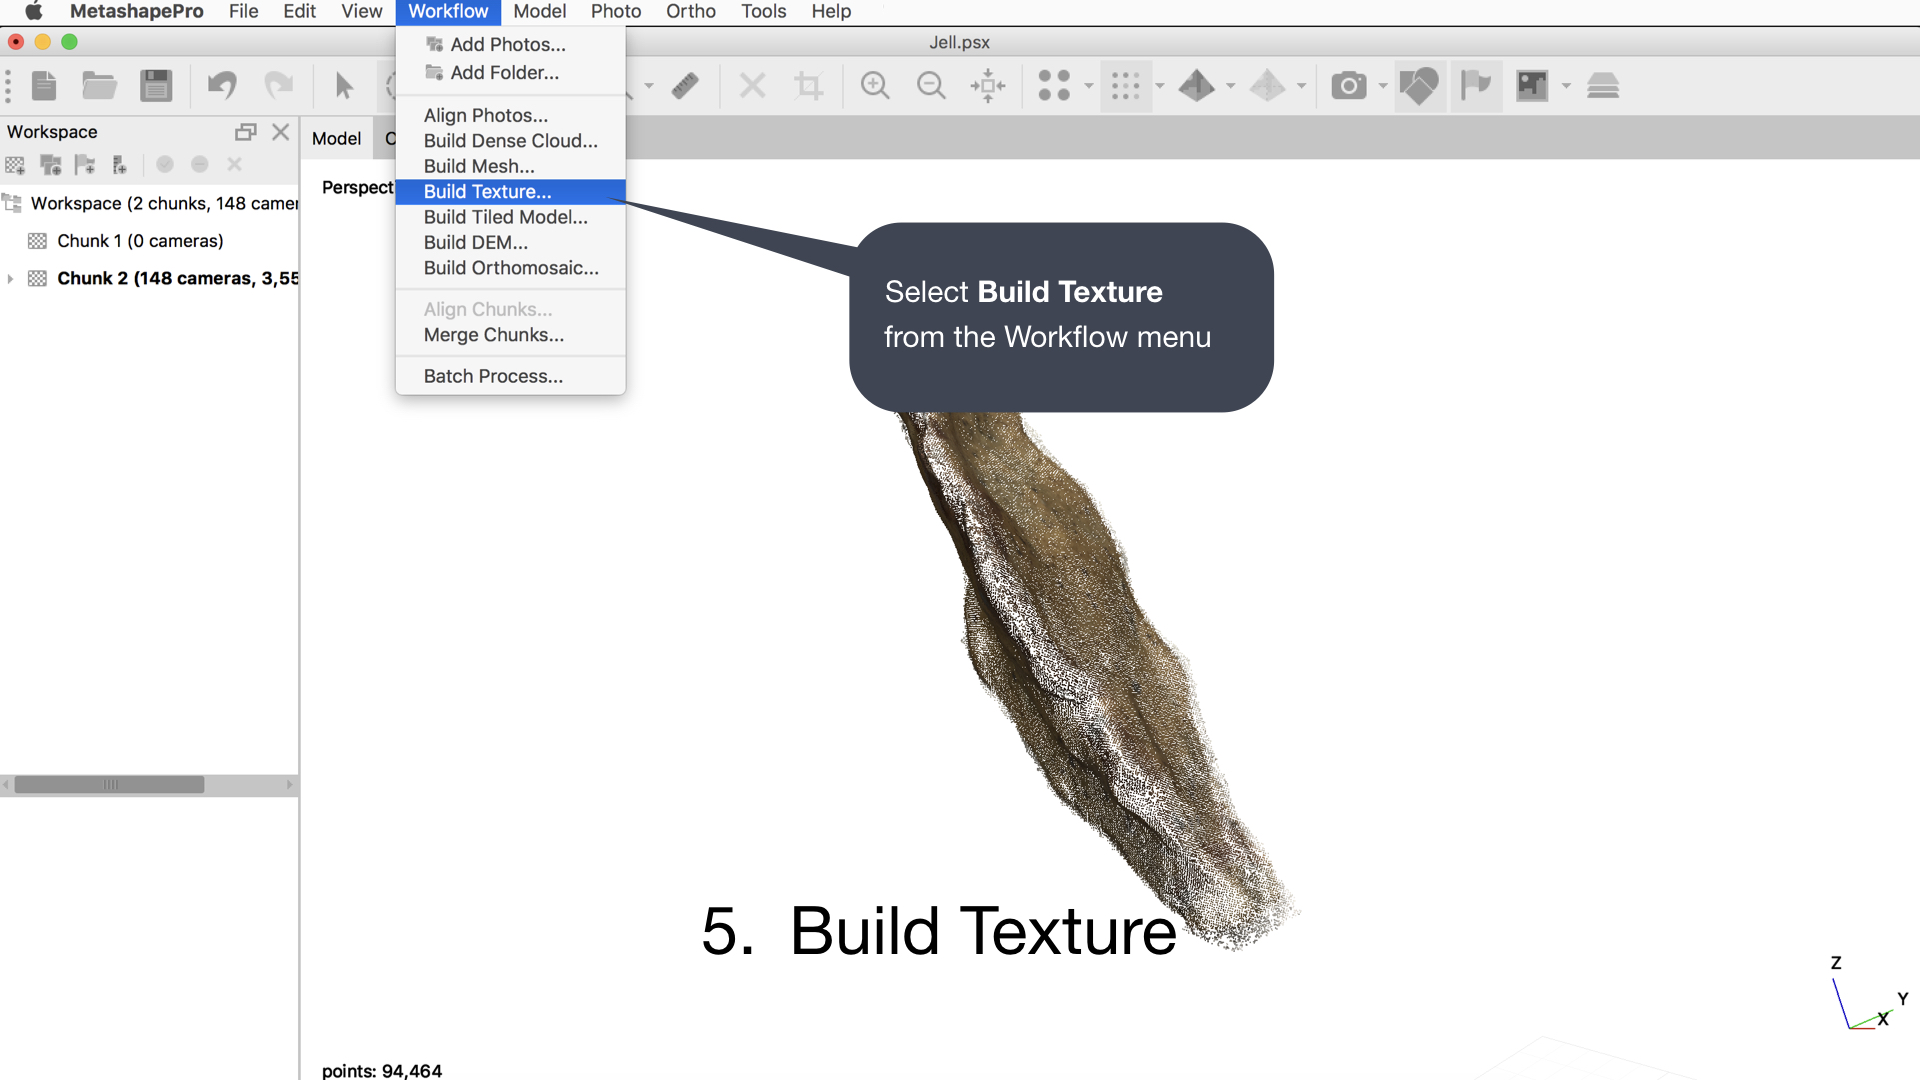
(5) Build textur/skin
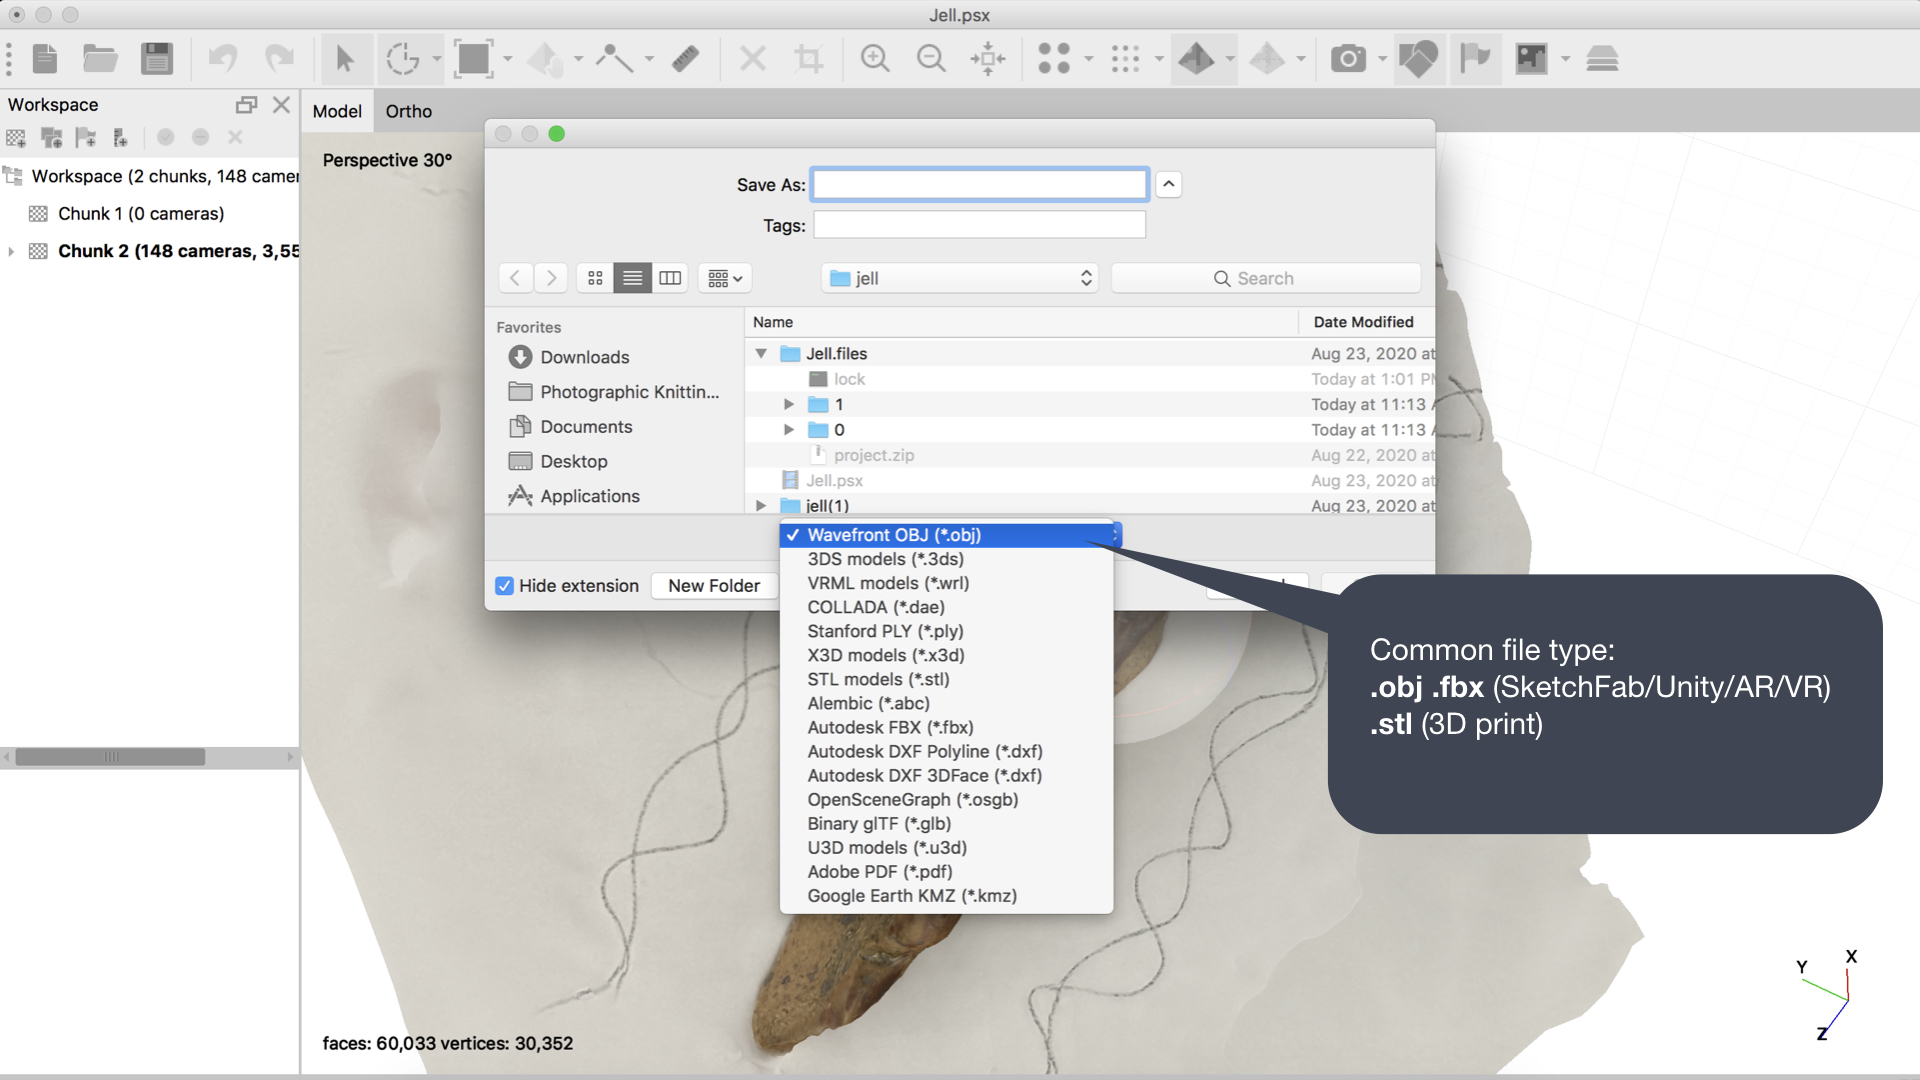
Export model:
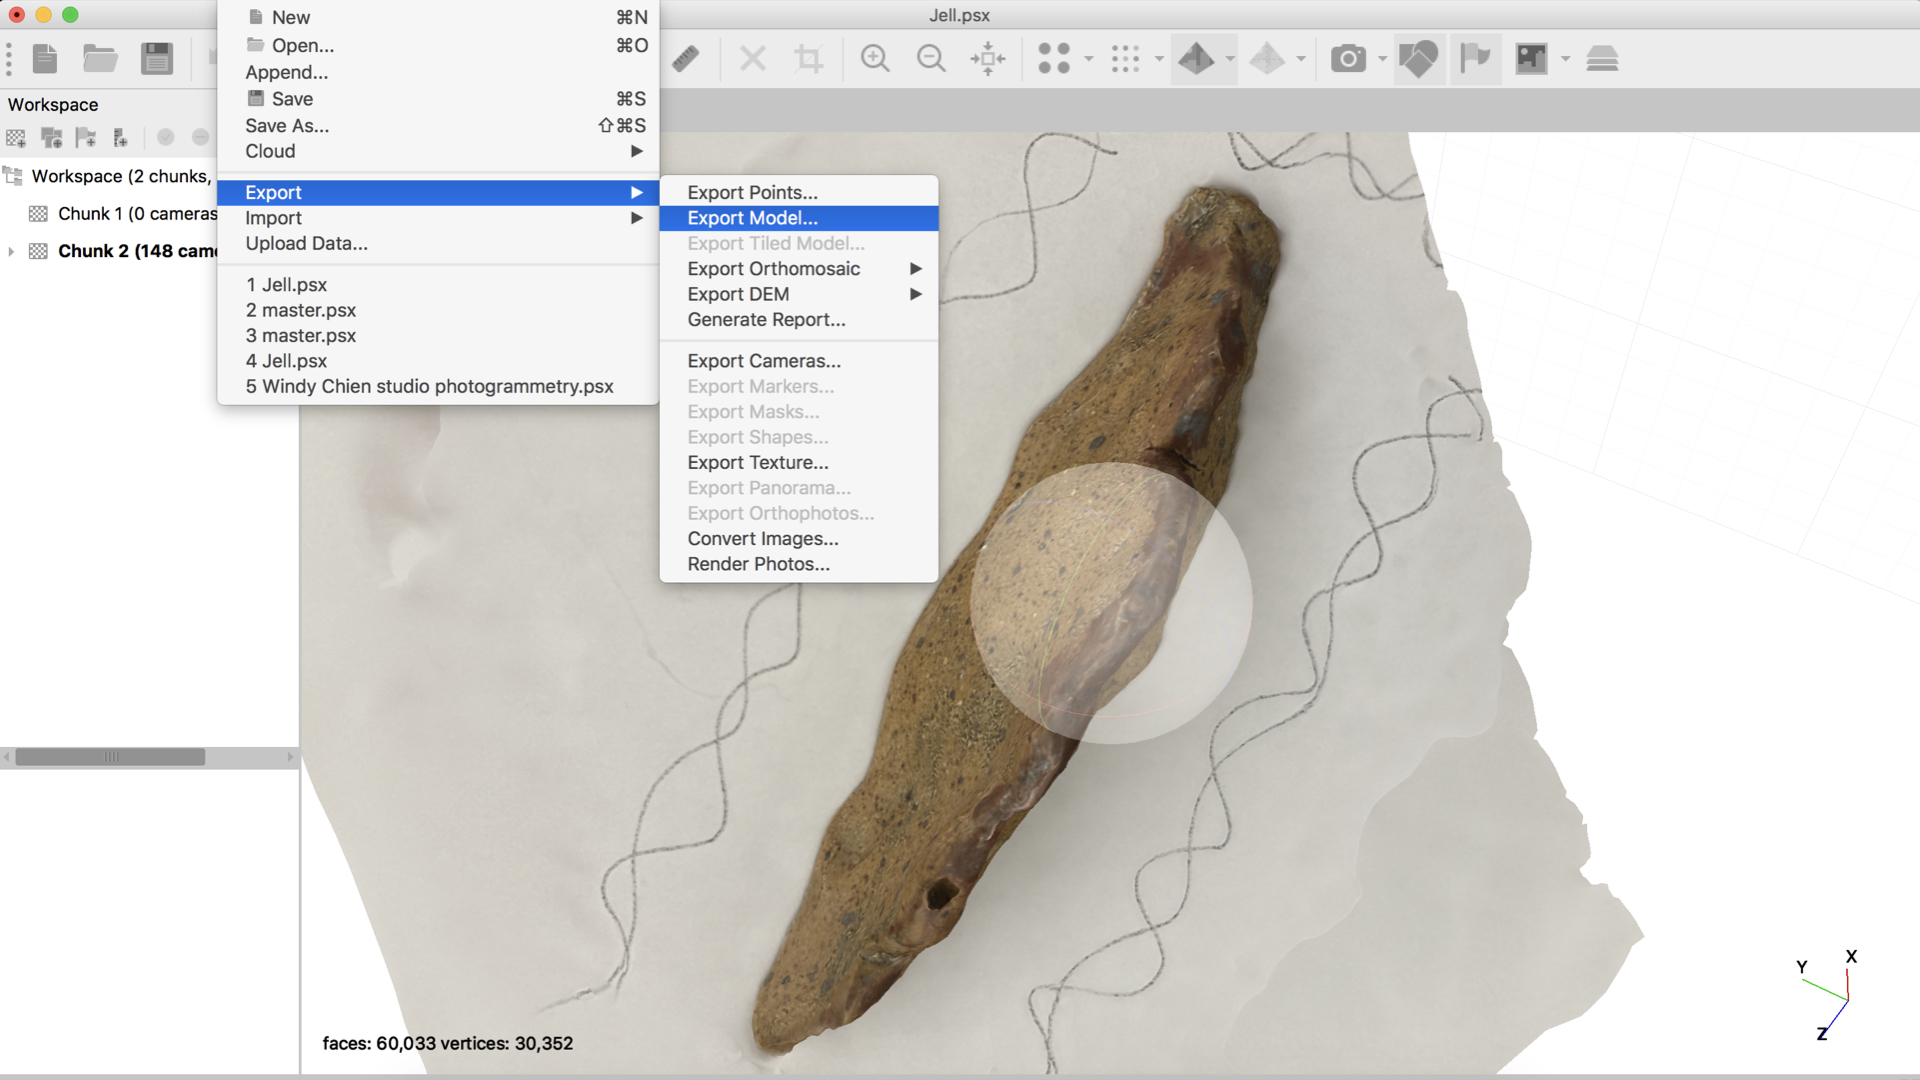
Common file type:
.obj .fbx (SketchFab/Unity/AR/VR)
.stl (3D print)
.obj .fbx (SketchFab/Unity/AR/VR)
.stl (3D print)